There are a number of ways to discount merchandise in Artisan.
This article will list each method. Some of these methods require additional licensing and will be indicated.
Important Assumptions: First, to keep from being too redundant throughout this article:
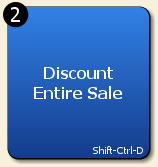
- To Activate a Button, click it. You can touch these buttons as well if you are on a touchscreen enabled device, like our Audrey A5 computers. You can also press the shortcut key combination in the black circle.
- Additionally, you can press the Hot Key, which is shown in the bottom right of the button (in this case, Ctrl-D). The Hot Key works without having to use the Operations Menu. So, from the Sales Screen, you can simply press Ctrl-D and it will discount the item.
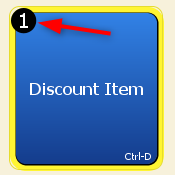
- This will work when the cursor is on the line item or on a blank line below the item.
You can scan an item, and then immediately press Ctrl-D and the discount will apply to the item you just scanned. - To change a discount from a percentage or a dollar amount:
- For a percentage discount, type the percentage and then press enter.
- For a dollar amount discount, type the amount. Always include the decimal. For a $25 discount, type 2 5 and a period.
- To switch back to a percentage, type the % key.
Option 1: Manually Discount a Single Item by Percent or Dollar Amount

After placing an item on the sale, do one of the following:
- Touch or click on the “Discount” field on the same line as the item you want to discount.
- Press the Hot Key Ctrl-D to move to the discount field while on the line or on the blank line below.
- Activate the “Operations” button (by touch, click, or Ctrl-O).

Then, select the DISCOUNT button and choose “Discount Item.” - Type the percentage amount or dollar amount (with a period) and then press Enter.
Option 2: Manual Price Override converts to Dollar Discount

This works by typing in a new price on the sales screen. After you press Enter, it reverts the price to the original amount and enters the difference in the discount column, resulting in the correct discounted price.
For example, if the item’s normal price was $75.00 and the discounted price is $59.99, type in $59.99 in the price field. Artisan will add the $15.01 in the discount column.
The default for this setting is Yes.
Option 3: Discount by Item or Category by Percent or Dollar Amount
In the Item or Category record, you can discount the item or all the items in a particular category.
![]()
Type in the percentage off (shown with the %) or a dollar off (shown with a decimal, like 15.00).
You can also optionally choose a date range where the discount only applies during this range.
Discounts in parent categories inherit to sub-categories unless you override those discounts by adding a specific non-zero discount in the sub-category.
If you have a Christmas category as a parent category and an Ornaments category inside Christmas, and you put in a 10% discount in Christmas, the Ornaments will also be discounted 10% unless you change the Ornaments to have, for example, 15% off. If you don’t want to discount Ornaments, then you would need to have no items directly under Christmas, and create sub-categories. Then, choose which of those categories you would want to discount or not.
If you have specific items within those categories that you do not want to discount, then you can turn this off in the item record by checking the “Disable Automatic Discounts” box.![]()
This setting does NOT prevent you from overriding the price or discounting the item on a sale manually.
After making some of these changes to the item or category, you may have to restart the Sales Screen for them to take effect.
Option 4: Discount by Vendor or Other Criteria
There is no discount field in the Vendor record. In order to discount by vendor, you need to do a bulk change to set the individual item discount. This is an easy process and could also allow you to have other criteria such as items over a certain dollar amount, age of inventory, or lots of other factors. Most retail situations could benefit from this technique.
The key is being familiar with the Power Search Filter.
Once you have your filter in place, choose the “Bulk Changes” button and the “Bulk Change Retail Discounts” button.
![]()

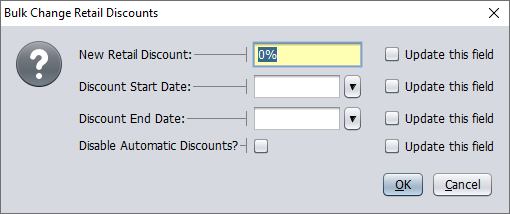
If you want to reset the value back to zero or blank, you will need to check off the “Update this field” option.
Once you click OK, the operation will complete after a confirmation and those items will be discounted as indicated.
Option 5: Discount by Customer
In the customer records window, you can specify a customer discount that applies to all items that do not have the Disable Automatic Discounts flag set.
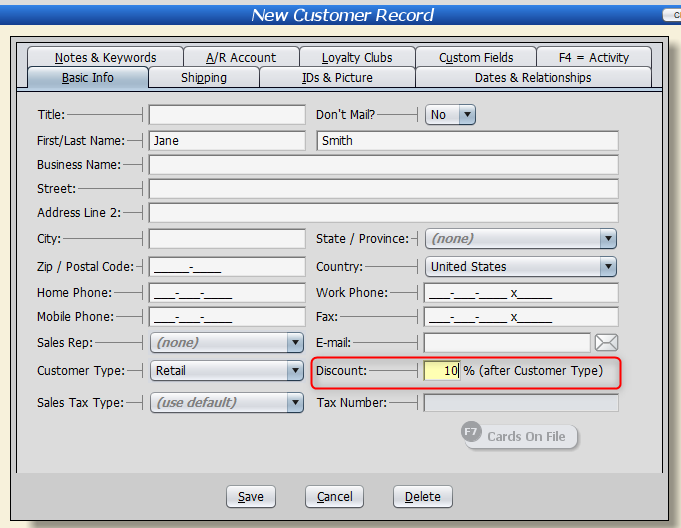
If this customer also has a customer type, then the discount in the customer record will be applied after the customer type price or discount.
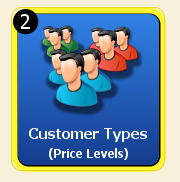
Option 6: Discount by Customer Type
In Artisan, there is always at least one Customer Type, called Retail.

But you can add more customer types if you need them. Here are just a few examples: Employees, VIP, Gold, Preferred, Wholesale, Military.
With the customer type, each item or category can have its own discount.
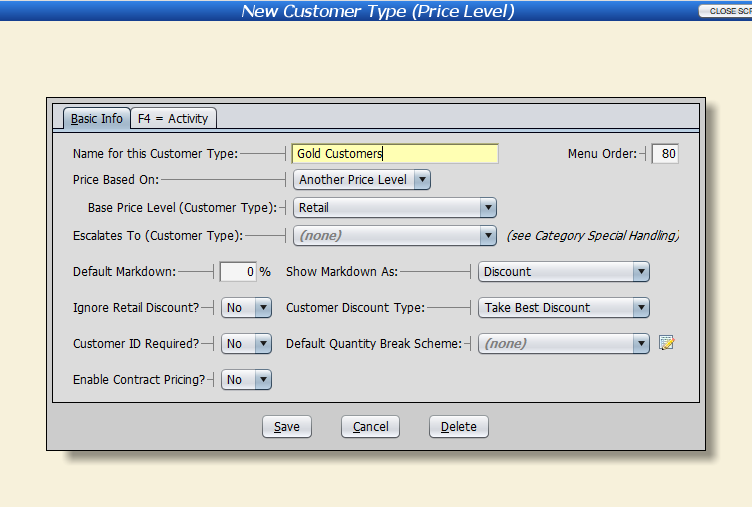
As you can see, there are a number of options for customer types, which is beyond the scope of this article. But a simple model that is commonly used is to set the category discounts for the customer type. You would usually want to have different discounts for different categories. Otherwise, you would just use the Customer Discount instead.
Option 7: Discount by Coupon / Discount Entire Sale
In Artisan, a coupon is an item record that is in the coupon category and has special behaviors. It extends the discount from one item to all items on the sale that do not have automatic discounts disabled.
Essentially, it’s similar to choosing the Discount option from the “Operation” menu and choosing “Discount Entire Sale.”

You can choose the Discount Type to control whether or not the discounts are combined or if the Best Discount is used.

In this example, the discounts are combined, and the coupon is calculated after the item discounts.

Here’s the math:
The base discount: 9.50 + 21.50 = 31.00 x 0.12 = 3.72
The additional coupon discount: 31.00 – 3.72 = 27.28 x 0.10 = 2.73
Using the item coupon vs. discounting the entire sale can provide additional information on the source of the discount since you can create as many coupons as you want, even if they are all the same discount amount. Also, a coupon can give you a choice on the discount type for different circumstances.
For the Discount Entire Sale option, you have a fixed choice from the default’s configuration options.

Note: You can split discounted items and non-discounted items on the same sale by using the Preceding Lines option.
Remember that you can also create amount-based discounts by typing in the amount with a decimal point.

If you want to limit a coupon to a specific item or category, you should use the Two-Fer Discount Pricing Scheme.
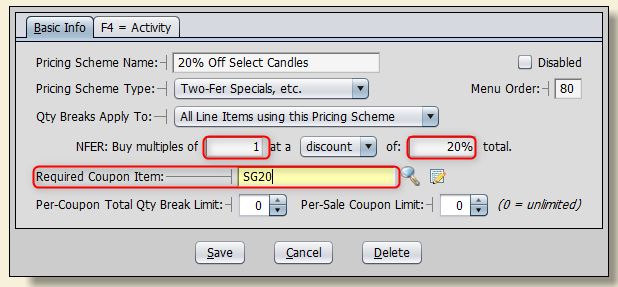
Option 8: Restrict a discount to a select group of items. (Requires additional license)
If is often desirable to limit the coupon to a specific item or group of items. At the moment, the easiest way to do this is by using a Two-Fer pricing scheme.
The key is to choose a Required Coupon Item which activates the discount chart already assigned to an item or category.
This category has the pricing scheme selected.

But because it has the requirement of a special item, the discount does not apply unless you put that coupon on the sale.

Notice that another item (not in this category) does not get a discount from this “coupon.”
Here is what this “coupon” record looks like, but the specifics are not important. The main thing to note is that it DOES NOT need to be in the “COUPON” category.

Option 9: BOGO (Buy One Get One) (Requires additional license)
This is a very popular technique for increasing sales and customer satisfaction. It is very easy to setup in Artisan. The key is to be clear on which items count toward the BOGO. It can be one specific item or all the items in a category, or even random items that are all using the same scheme, which is the default. Specify the BOGO in the Retail Quantity Breaks in the item or category.
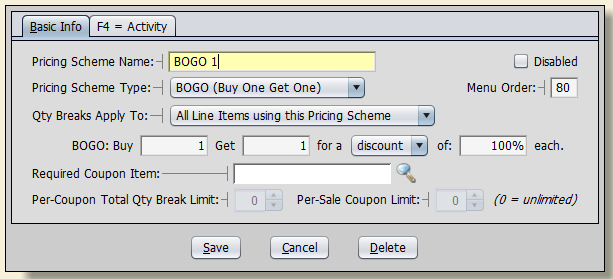

As you increase the quantity of the item being sold on the sale, the BOGO will kick in. This normally creates a new sale line to reflect the free product to make it clear to the customer.

There are a number of options in the pricing scheme which can provide different discounts and pricing options.
Here are a few examples:
- Buy 2 get 1 Free
- Buy 1 get 1 50% off
- Buy 3 get 2 Free
- Buy 1 at regular price, get one for 1.00
You can also limit the number of coupons used on a sale.
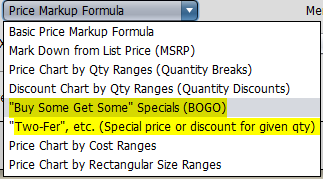
Option 10: Two Fer Specials (Requires additional license)
The “Two Fer” options allow you to increase sales by increasing the number of units sold by enticing your customers that when they purchase more, they save more.
A good example might be 3 items for $9.99 when the regular price of one is $4.00. It is better to choose amounts that are equally divisible by the number of units required. So, 3 for $9.99 is $3.33 each, which is perfect. If you did 3 for $10.00 instead, then Artisan would have to give you an extra line on the sale to display the extra penny. So, two units at $3.33, and one at $3.34. You can see that it is much better to make the math come out even.

The rest of the same rules apply as for BOGO. You can specify by Item or Category.
Option 11: Tracked Coupons and Loyalty Club (Requires the Deluxe license)
A tracked coupon is one where it is assigned to a specific customer and is limited to a single use. Normally these are issued by a Loyalty Club, but you can also issue them manually.
From the Accounting Menu, Choose Credits, Coupons, & Gift Cards, then Tracked Coupons.


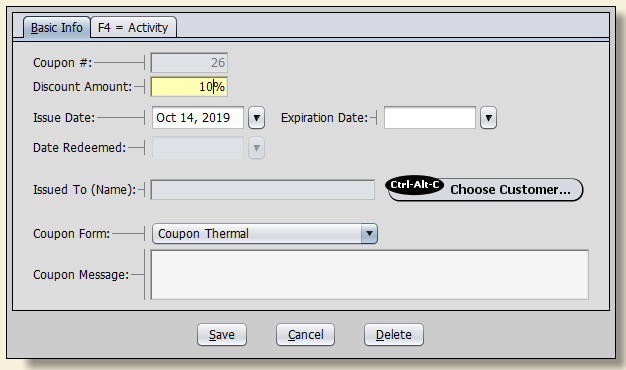
The coupons will apply to all items on the sale unless Automatic Discounts are disabled.
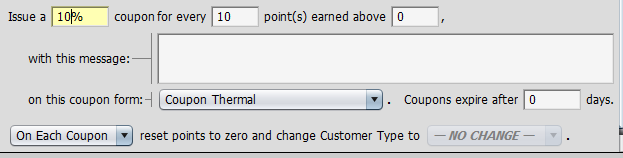
Loyalty Clubs let you issue this coupon’s base on customer purchases. They can be either a percentage off or an amount. Again, you can change between percent and amount by either typing the % key or the decimal key.
Option 12: Inventory Kits (Requires the Deluxe license)
With a Kit, you can offer a variety of products in a “basket” for a special price. Sometimes that price might be at a discount from the normal price of each item and sometimes that price might be more to cover the convenience and effort of organizing a select group of items.
On the Horizon
Although the discount options here are very powerful and seemingly plentiful, there are still situations that are hard to get an automated discount. You can always manually override the price or add a discount to an item, but often is more beneficial when these can be automatically selected by scanning a coupon.
Here are a few limitations that we hope to resolve in a future version.
- An easier way to specify that a coupon only applies to specific items or groups of items.
- Price and Discount Chart by Quantity Ranges (These are currently marked Not Yet Available in Artisan)
There are others we are also considering. Please provide us with suggestions on what discount strategy would be useful for you.