This article explains how to setup the Star TSP series printer for Artisan 4.0 on the Mac with or without a cash drawer
Note: There are some special configurations that need to be followed for current versions of Artisan 4.0, this article and the procedure itself will most likely change as Artisan finishes beta testing.
Step 1: Download & install the driver
First, we will install the printer using the manufacturer’s driver as any other regular printer.
1. Download the driver from http://www.starasia.com.hk/dl/driver/starcupsdrv-3.4.2_mac_20140203.zip
You could also download it from S:\Install\Certek Computer Setup\Printers\Receipt Printers\Star\Mac
2. Locate the driver in the designated downloads folder, it should be named “starcupsdrv-3.4.2_mac”
3. In the folder, locate the actual driver package to be installed, starcupsdrv-3.4.2_mac => Driver => starcupsdrv-3.4.2.pkg

4. Connect the Star Receipt Printer at this time
5. Double-click on the package to install it.
6. Follow the prompts. It should install and display a “successful” message.

Step 2: Verify printer is correctly installed
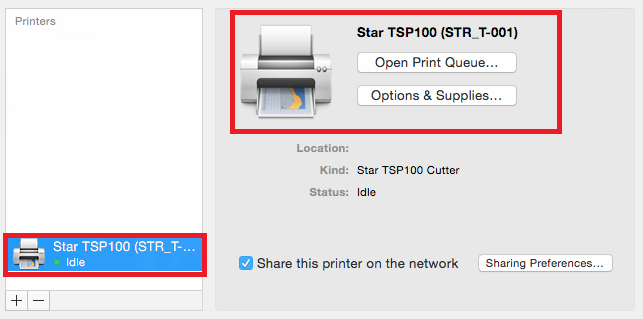
Now make sure the printer has been installed by checking the printers panel.
1. Open System Preferences
2. Select Printers & Scanners
3. Look for the Star Printer. It should be already on the list. See image below
Step 3: Set receipt printer in Artisan
Now, it is time to set it up in Artisan so that it prints receipts BUT does not open the cash drawer (YET).
1. In Artisan go to Printer Configuration (Main Menu => Tools => Program Options => Device Configuration => Printers)
2. Configure the Star printer following this image.

3. The most important setting here is “Printer Model”, if you will use a cash drawer attached to this printer, make sure “Other Thermal” is selected as the option.
NOTE: If you are not using a cash drawer, you could select “Star Compatible Thermal Receipt Printer” for Printer Model; otherwise, MAKE SURE “Other Thermal” is selected or it will cause issues in the next steps. Also on the mac you will need to delete any control string characters from the “Setup String” field.
Step 4: Disable default cash drawer feature
If you have followed the steps correctly with the driver, the CUPS interface should allow disabling the cash drawer for the Star printer.
1. First, try to access the CUPS interface by opening the web browser and going to http://localhost:631/printers/
If CUPS interface is not enable, you should see instructions on how to enable it by going to the Terminal and typing “cupsctl WebInterface=yes”
Once it is enabled, then try again going to the address given above.
2. From the list of printers, select the Star Printer to go into its options

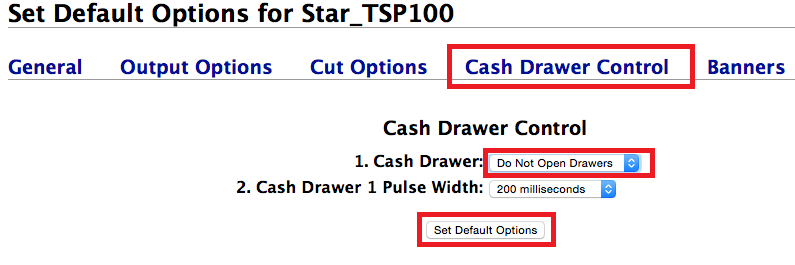
3. Go into the “Set Default Options” by going to the drop-down menu

4. Select “Cash Drawer Control” and set it up according to the image below. Make sure Cash Drawer is set to “Do Not Open Drawers”
If you are not using a cash drawer with this printer. This would be the last step and you do not need to keep going. Just make sure everything works as supposed to.
Step 5: Add fictitious printer for cash drawer
Since the Star interface does not work correctly yet, and we need to control the printer in different manners, the only option we have available is to create a virtual printer through CUPS that allows us to talk to the Star printer and work independently to open the cash drawer. To do this, follow the steps below.
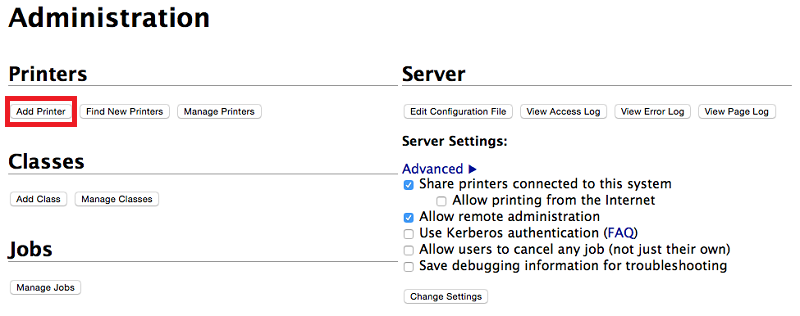
1. Go to http://localhost:631/admin and add a new printer.
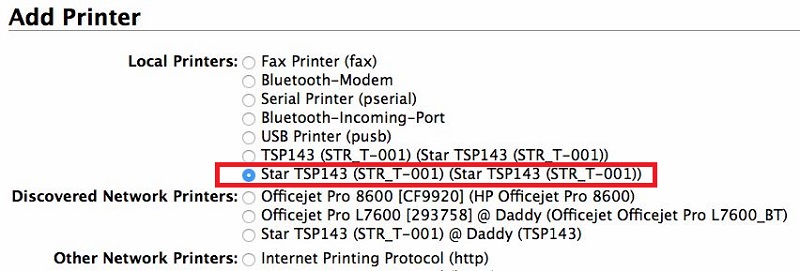
2. Pick the Star printer from the list of local printers, this will let us send commands to this printer even though it is already installed and being used by the OS. Notice there are two instances for the Star TSP on the list. Select the one that starts with the actual brand, “Star” in this case, although this does not really matter.
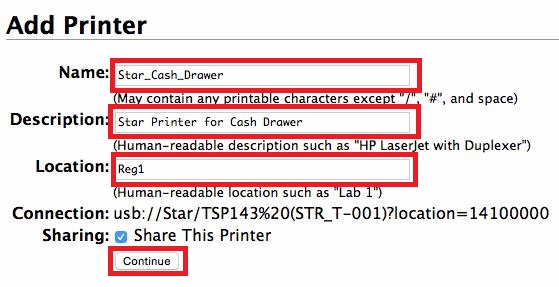
3. Name this printer Star_Cash_Drawer.
Description: Star Printer for Cash Drawer
Location: RegX (X being register number)
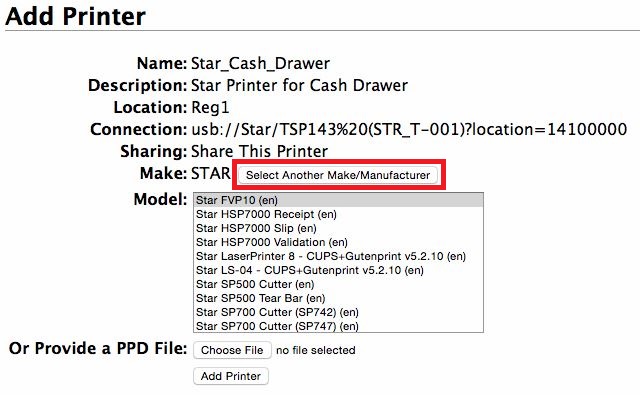
4. For the make, click on “Select Another Make/Manufacturer” and then search the list for “Raw”
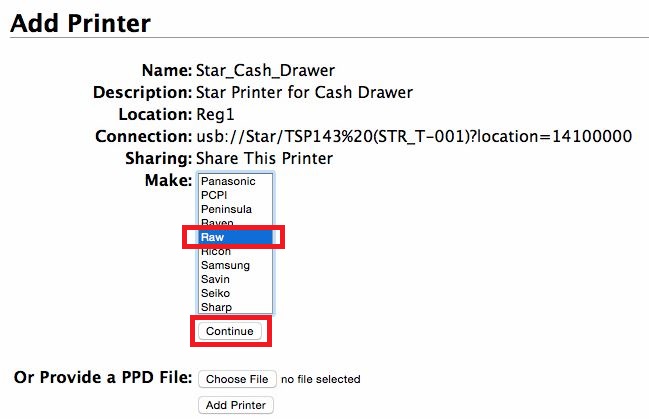
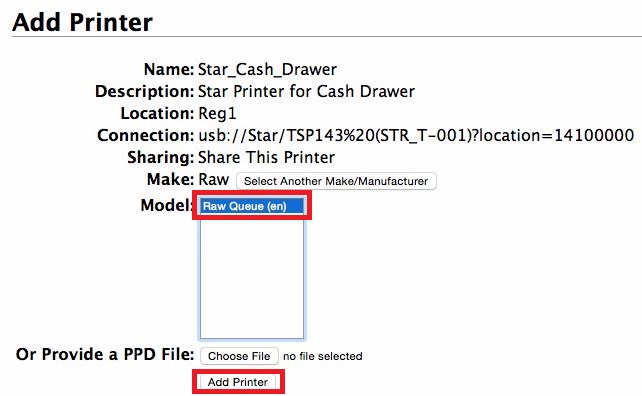
5. Click “Continue” then select “Raw Queue (en)“. Lastly, click on “Add Printer” to finish adding a raw instance of the Star printer.
6. Now that we had added the raw printer, we need to add a class so that it shows up on the operating system interface and Artisan is able to use it.
-
-
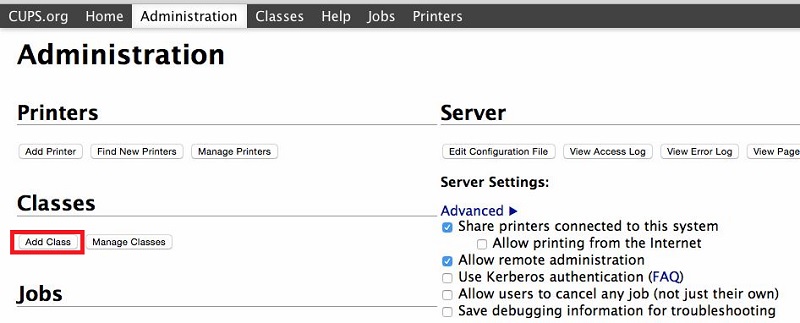
- Go back to CUPS administration: http://localhost:631/admin
- Select “Add Class”
-
-
-
- Name the class according to the image below. This description is what will show up on the on the OS and Artisan.
- Select the Raw Printer just added as the only member for this class
- Finish by clicking on “Add Class”
-

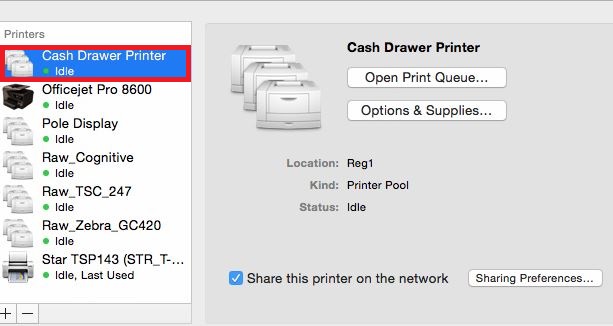
7. Now just to make sure the fictitious printer has been added correctly, check Printer & Scanners under System Preferences and it should be there just as the image below.
Step 6: Setting Cash Drawer in Artisan
1. Go back to Artisan Device Configuration Screen
-
-
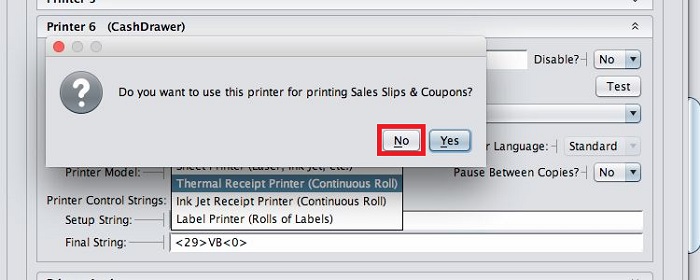
- Set a printer on slot 6 named “CashDrawer” using the fictitious printer we just added on CUPS
- When asked whether or not to use this printer for Sales Slips & Coupons, select “No”
-
-
-
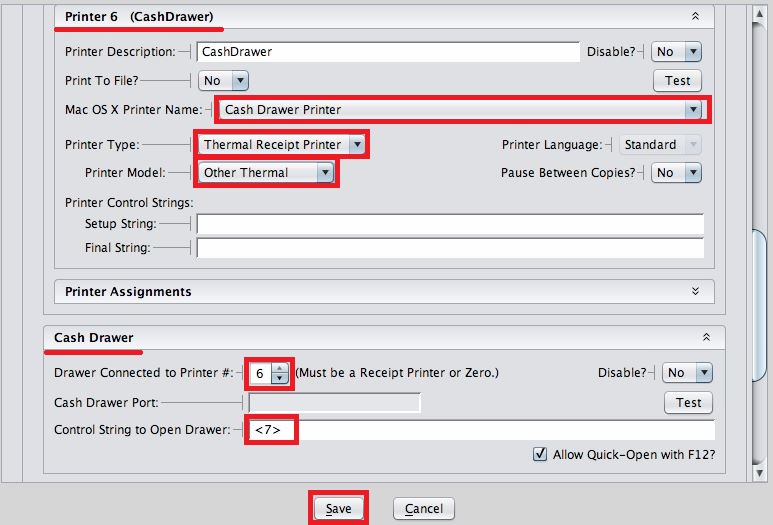
- Set the Cash Drawer using this printer 6, also add the Control String to Open Drawer: <7>
- Follow the image below.
- Save your settings. Everything should work correctly.
-
Things to test:
-
-
- Test printing a receipt from the Receipt Printer “Test” button
- Test opening the cash drawer from the Cash Drawer “Test” button
- Make sure there are not jobs stuck in any queue. If there are jobs stuck, clear them and make sure “Other Thermal” is set for both Receipt and CashDrawer printer within Artisan.
- Lastly, test doing a sale. It should print a receipt and open the drawer too.
-