The “Record List Screen” is a powerful tool used to view, select, and edit a filtered list of records such as “Item Records,” “Category Records,” and “Vendor Records,” just to name a few. The record list screen is used throughout Artisan and does have some variations, but all have a common theme. We will be using the “Item Records Screen” for our example.
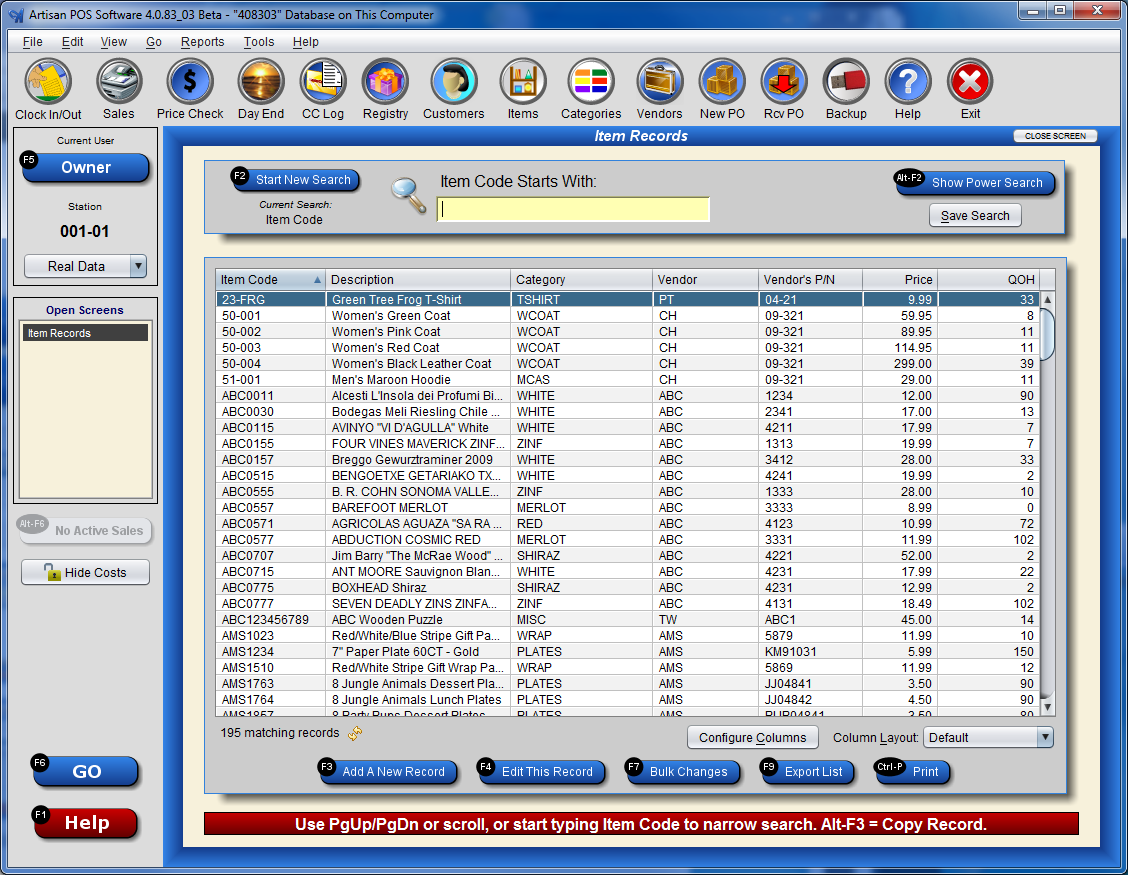
The record with the highlighted background (shown in blue) is the selected record.

Pressing ENTER will perform the default action for the particular screen on the highlighted record. When you are just in a basic record list, such as “Item Records” then pressing ENTER will edit the record. But if you are in a record list screen that is asking you to make a selection, ENTER will select the record. For example, in the Sale Screen, the customer prompt will present as a customer record list screen to select the customer, but when used from “Customer Records screen, ENTER will open an individual Customer Record screen.
![]() Note – In all of Artisan, F2 is always associated with searching, F3 is always used for adding a new record, and F4 is always used to open an individual view/edit detail screen for the current highlighted record. Alt-F3 is like F3, but starts the new record screen with fields copied from the current record.
Note – In all of Artisan, F2 is always associated with searching, F3 is always used for adding a new record, and F4 is always used to open an individual view/edit detail screen for the current highlighted record. Alt-F3 is like F3, but starts the new record screen with fields copied from the current record.

In the top left corner of the search filter box, you see the F2 “Search Scheme“ button. This is the primary way of changing your search. The search scheme saves both your filter field and sort order field, which are not necessarily the same. When you first switch to a new search scheme, they will start out the same. When you create a new search scheme, Artisan makes sure that the field you select is included as one of your field columns.

To create a blank new record using only the built-in and user-defined record defaults, press F3 or the “Add a New Record” button. To copy a record, use Alt-F3.

If you press F4 or select “Edit This Record,” the record that is highlighted will be opened. In cases were the records are read-only, this button will be labeled “View Details“.

Click on a field column header to change the order. Click again to toggle between ascending and descending order. The small blue triangle points up for an ascending (A to Z) sort order.

The arrow pointing down means the records are sorted in a descending (Z to A) order.

Shift-Click will allow you to specify up to three additional sort orders for a total of four sorted fields. First, click on a field header to start the search, then Shift-Click to select the 2nd, 3rd, and 4th field orders. Shift-Click again on the same field header toggles between ascending and descending.

To add or remove field columns or to rearrange them, right-click or choose the “Configure Columns” button to add or remove field columns from your view. If you add more columns the screen may horizontally scroll, or you may re-size your window to allow for more room.

Another way to rearrange columns is to click the field header and drag it where you want it to go.

The search box at the top of the screen allows you to filter your searches depending on the option you have selected. Use F2 or click on the “Start New Search” button to change the search criteria.

The “Show Power Search” button is used to reveal an additional set of record filters customized for each record type. Therefore, no two record types have the same options. The power search is broken up in two or three tabs depending on the record type.
For more detail on using the Power Search Feature, please read Using the Power Search Feature article.

Once the power search is visible, you can hide it without interrupting the filter to allow you to see more of the filtered records. Click on the red X, ![]() to clear the filter or press “Show Power Search” to reveal the filters again.
to clear the filter or press “Show Power Search” to reveal the filters again.

If you need to change more than one record at the same time, such as a price change for an entire category, then you would want to use “Bulk Changes.” “Bulk Changes” are specific to each of these record types: “Item Records,” “Category Records,” “Vendor Records,” and “Customer Records.”

Use this option to export your data to a .CSV (comma delimited), .TXT (tab-delimited), or .TTX (Artisan’s multi-table file structure, called Tagged Text) file. You will be prompted to include either just the columns in your configured column view (even if those columns are scrolled out of sight) or ALL exportable fields. The record, power, and advanced filters will be honored, so you could, for example, export just the items from one category.

If you want to print out a list of records or print out a page on each record, then press Ctrl-P or choose this button. You will be given various general printing options, but the report will be sent to the printer you have set as your report printer in Printer Assignments. See Table Printing Options.