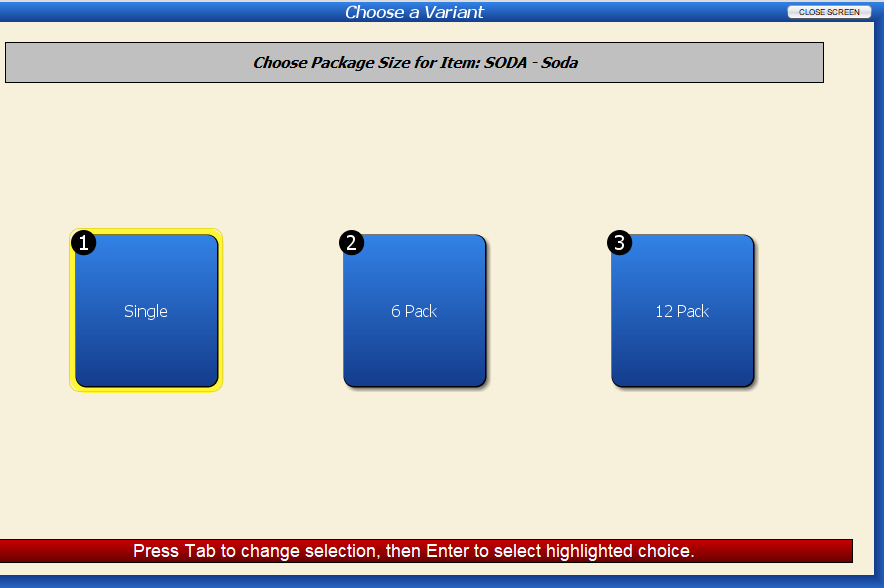
In Artisan, it is easy to sell items in various quantities, such as case, 10-pack, or whatever variations you want. For example, you can sell soda by single, 6-pack, 12-pack, or case of 24. If the case has its own UPC code, you can add that UPC code to the variant, and then the case will automatically ring up when scanned into the sales screen.
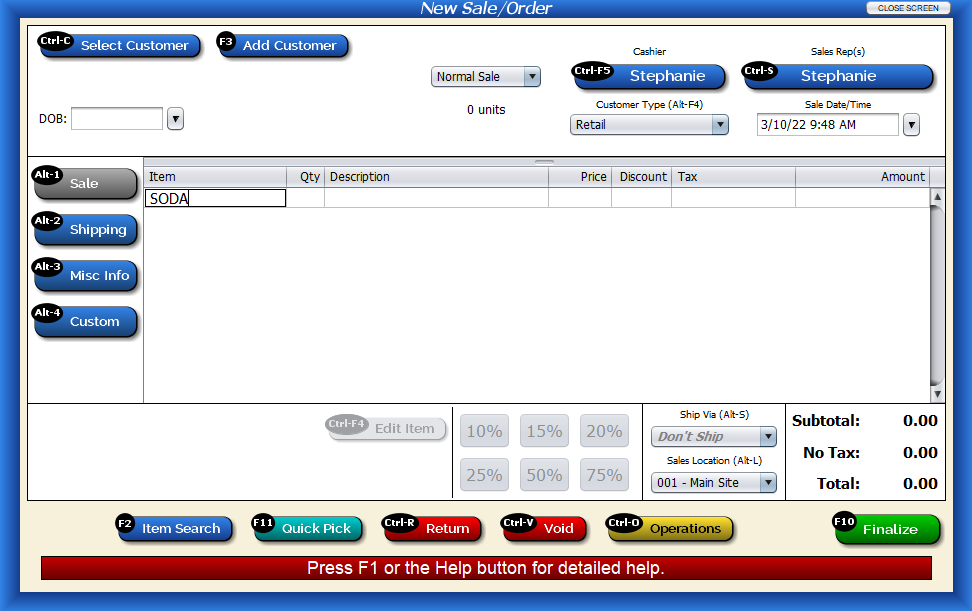
If you ring up the “base product,” then Artisan will prompt you for all the quantities of the item that you sell.
If you print out barcodes from Artisan, then those will bring up the exact quantity if you have them pre-packaged.
Note: You always track inventory by the smallest unit you sell. For soda, it would be singles. The total quantity on hand would be 24 if you had 4 6-packs, and 23 if you had split a 6-pack to sell 1 single. There isn’t a way to track the number of cases and the number of singles (unless you use different base item records). However, some reports can do the math for you to show you how many cases you have, even if that number is fractional, such as 3.83 in our example of 23 singles.
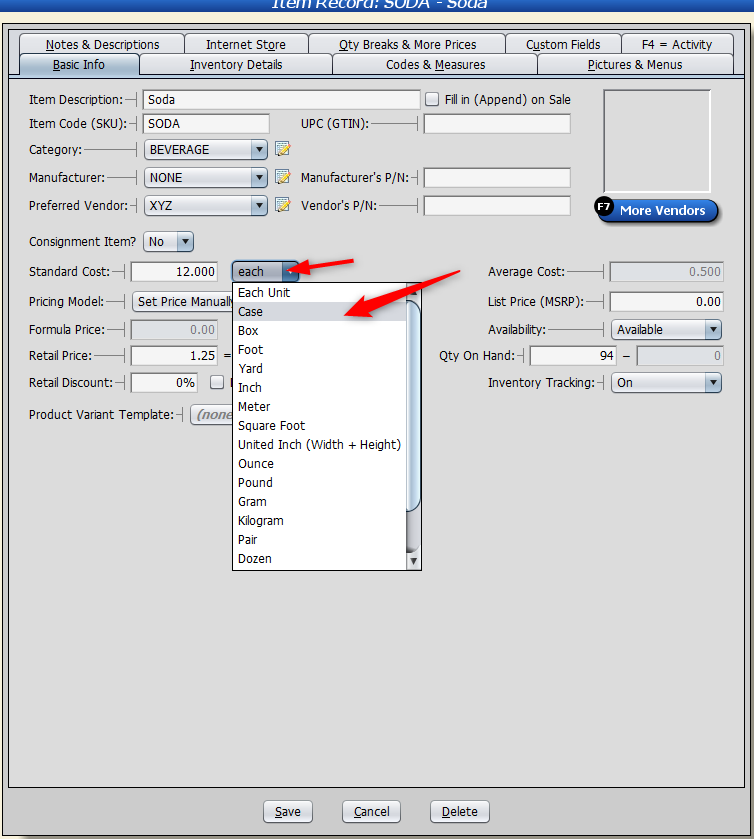
Often when you set up these items, you buy them by the case. You can specify that unit of measure in the item record as shown in the following example. Although this is often what happens, selling by the case isn’t required as part of the process. Scroll to the bottom of the article (or click here to jump to the section) to find out about this other method (buying by “each“).
Setting Standard Cost to “Case”
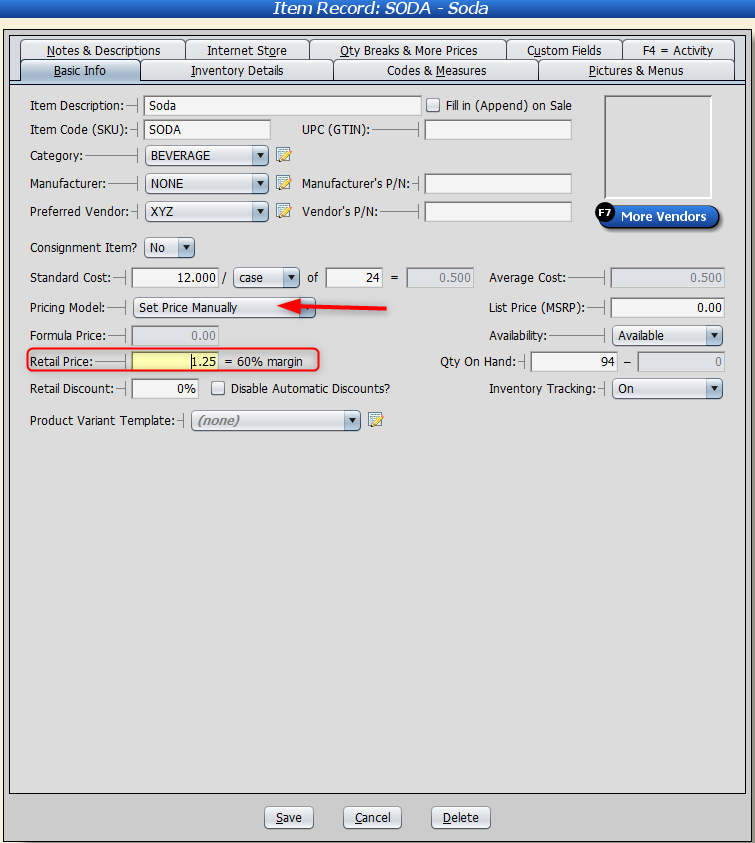
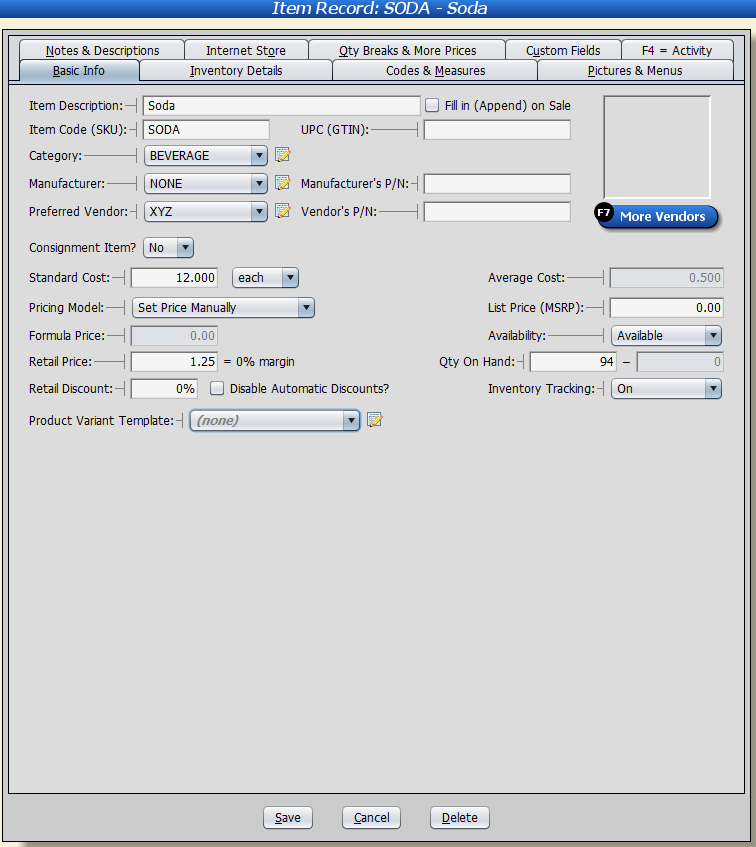
- We’ll need to create a base product. Fill out its description, category, and other relevant information. Then, under the “Standard Cost” drop down, change the default to “case.”
Set how many items are in each case and how much each case costs.

2. Leave the “Pricing Model” as “Set Price Manually.” Choosing a different pricing scheme will cause the retail price to lock, and you won’t be able to change it.
By setting the price manually, we can adjust the number to whatever price we want.
For example, if we choose the “Keystone Markup” pricing scheme, it locks our retail price in place–notice that it is now grayed out. It took the standard cost and doubled it.
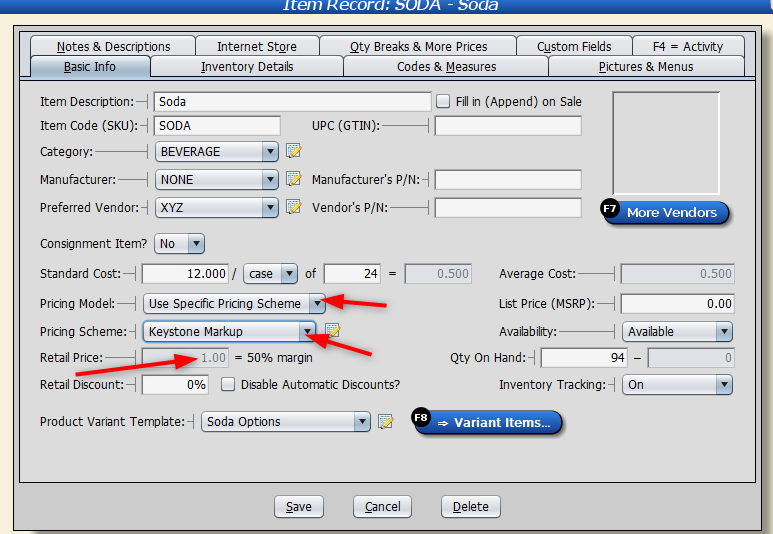
By setting the “Pricing Model” as “Set Price Manually,” we can control the retail price and enter whatever amount we want.
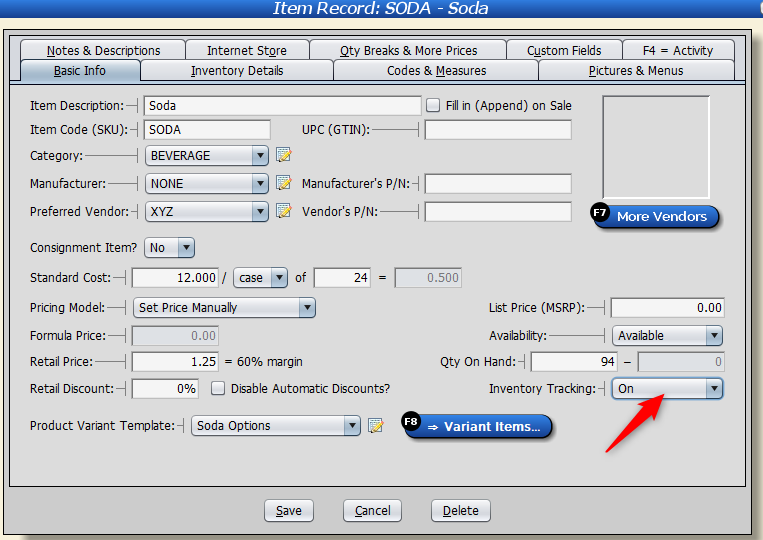
3. Before going any further, please make sure “Inventory Tracking” is turned on.
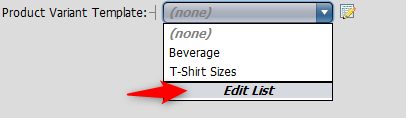
4. Next, we’ll need to create a product variant template. From the dropdown, select “Edit List” and add a new record.
5. Give the template a name. Turn “Track Inventory (QOH) of Individual Variant Item Records” to “No.”
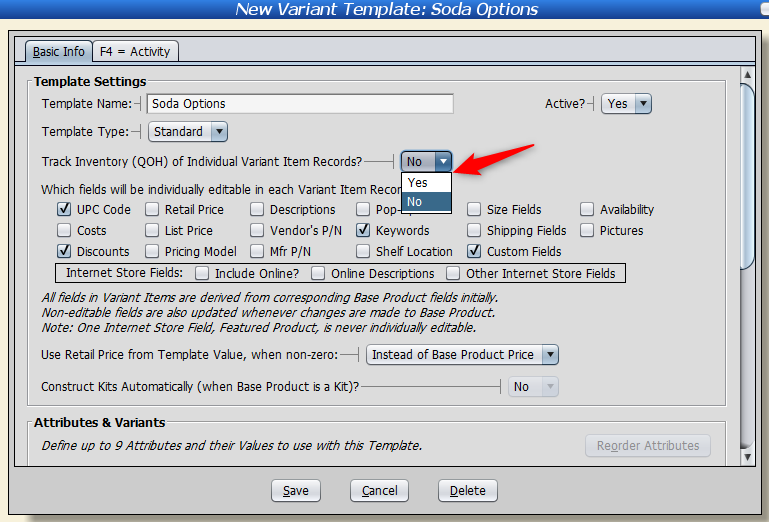
6. Next, give your attribute a name (ex. Size) and press “Enter.”
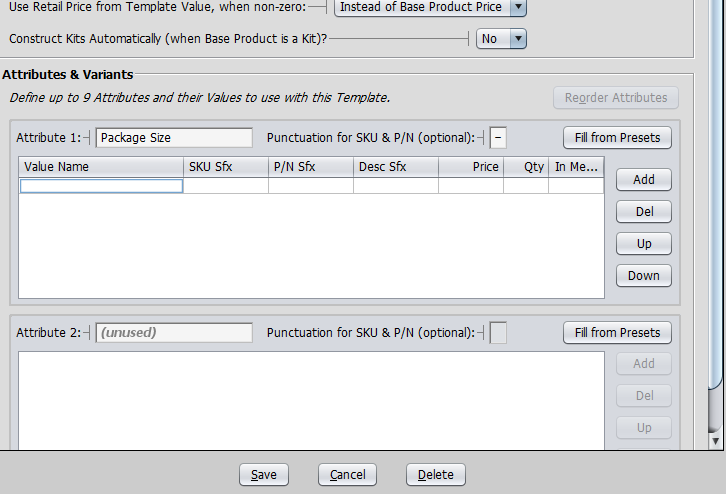
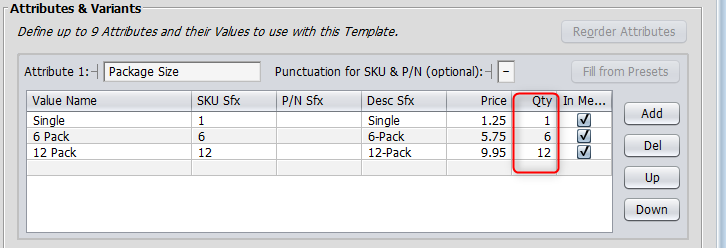
7. Enter the variant information. You’ll notice that the SKU suffix and description automatically default for you.

8. You’re able to edit the price, if necessary.
You’ll also want to edit the “QTY” section to reflect the number of items in the pack (ex. single is 1, 6-pack is 6, and 12-pack is 12.) This “QTY” section is NOT the same as quantity on hand.
Your inventory is tracked in the single quantity.
The inventory for the products in the cases is multiplied by the single quantity, then subtracted from the overall case quantity.
For example, if you sell a 6-pack of soda, it is then multiplied by the base (in this case, 1) and subtracted from your overall case quantity (in this example, 24). 6 x 1 = 6. 24 – 6 = 18. Your inventory of soda cans is now 18.
9. Searching for the item in the Item Records screen, you’ll notice the base product listed as well as the variants we just created.

Setting Standard Cost to “Each”
If you don’t want to include items by the case using the method we showed in the previous steps, you can follow this other method.
Instead of setting the item record’s standard cost to “case,” set the item as “each.“
Create a product variant template following steps 3-9 above.