Artisan allows importing files for different types of records. Only RAW imports can be done. That is, the user needs to compile a file to meet a specific format we will describe below in this article. Once the file is in one of the recommended formats, then we can use the Raw Import Utility in Artisan to add records to the current database.
Steps to Follow
1. Like with any other records we will be importing, the first thing we need to do is look at the proper column headers for this type of record. Artisan needs a specific code to identify the data being imported – and those codes are given to you in this article. If you import a file with column header names different from what is given in this article, Artisan will ignore the data under that column entirely. To avoid this from happening, make sure you use the column headers appropriately.
2. Then, we work on the file to meet one of these formats. You can use any spreadsheet program – common programs are Microsoft Excel or Google Sheets. Make sure you save the file as one of these formats:
- Tex (Tab Delimited) *.txt
- CSV (Comma Separated Values) *.CSV
- Database file *dbf
- Tagged Text *.ttx
- Excel Workbook *xls
- Excel Workbook *xlsx
3. Lastly, we import the file using Artisan’s Raw Import tool located at the top menu, “File,” and “Import.”

Important Notes
When importing Item Records, you have to be a bit more careful at the risk of accidentally creating duplicate items. Although Artisan is very smart about avoiding duplicates, you need to help the program by giving it more information about specific items, so they get placed under the correct vendor and category. For this reason, it is recommended that you use this essential information:

As you can see in the image above, items need more information, as they are usually linked to a vendor and a category. By importing all of this information with all items, Artisan will place the items in the right location and avoid duplicates.
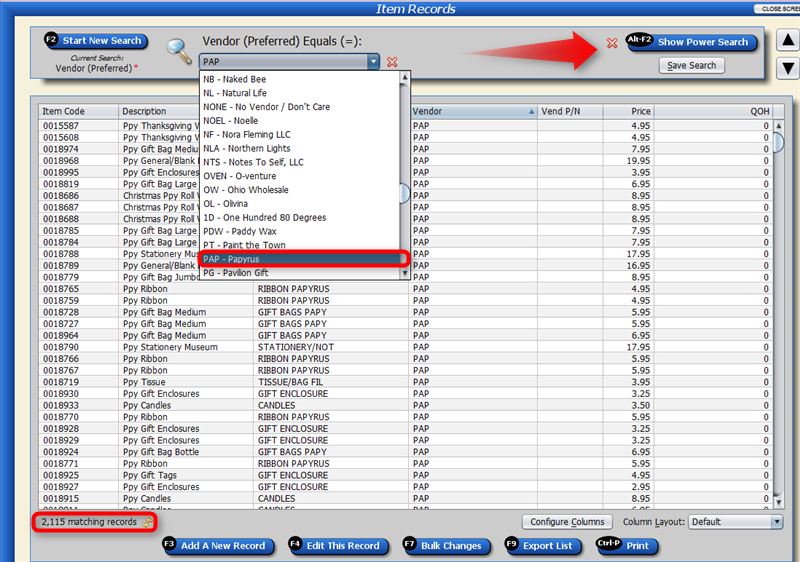
In Artisan, the “Vendor” column shown on item records is the actual Vendor Code.
If the vendor is non-existent in Artisan, you can create a column “VENDOR” on the file with the name you would like.
Or, if the vendor exists in Artisan, get the vendor code before importing items for the specific vendor. You can get the vendor code from the Artisan record. (See image below)

Here’s an example of a file containing item records ready to be imported into Artisan. Notice that we have more information for the item records file than we usually have when importing categories or vendor records. As discussed above, items need to be matched to a Vendor and a Category to avoid creating new items that could possibly be duplicates.
By matching the items to a Vendor and a Category, Artisan will match them to their respective locations in the database and save you a lot of work.
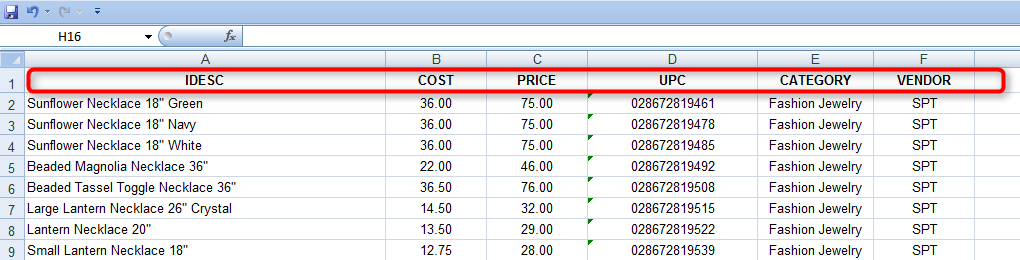
NOTE: Do not use a dollar sign for currency columns. Use “number” format or “general.”
The example above is what most people use when importing basic information for item records. This will populate Artisan’s database accordingly and give you the ability to change or update items later by doing another import or a Bulk Change within Artisan.
If you import an item that already exists in Artisan’s database where UPC and Vendor Part Number match the existing record, it will only update the item if anything is different on the new record.
We recommend the following columns to be included on the file to avoid duplicate records:
UPC, VITEM, IDESC, VENDOR, and CATEGORY
Using the appropriate fields on the table below:
- Format your Item Records File accordingly.
- Save it using one the file formats supported. (See beginning of this article)
- Then proceed to the bottom of this article for instructions on how to import it into Artisan.
Import Codes and Headers
Artisan Excel Header | Artisan Field Name |
STATUS | Availability |
AVGCOST | Average Cost |
BASEPROD | Base Product |
BRIEFDESC | Brief Description |
CASESIZE | Case Size |
SORTORDER | Catalog Order |
CATEGORY | Category |
CHANGESTATION | Changed At |
CHANGEDBY | Changed By |
CHANGEDDATE | Changed On |
COSTMODEL | Consignment Cost Model |
DFLTCONSIGN | Consignment Set by Vendor? |
SPLIT | Consignment Split |
CONSIGN | Consignment? |
CREATESTATION | Created At |
CREATEDBY | Created By |
CREATEDATE | Created On |
CUSTFLD1 | Custom Field 1 (Same format for rest of custom fields - 1 - 30) |
BASEDEL | Deleted By Base Product |
DEPTH | Depth |
IDESC | Descripton |
DISCOUNT | Discount |
DISCEND | Discount End Date |
DISCSTART | Discount Start Date |
DISCTYPE | Discount Type |
NODISCOUNT | Don't Discount? |
EDITIONSZ | Edition Size |
COSTPERCENT | Estimated Cost |
DESC2 | Extended Description |
XCATCODES | Extra Categories (Online) |
FEATURED | Featured Product (Online) |
FILLDESC | Fill In Description? |
HEIGHT | Height |
ID | ID |
INSTORE | In-Store Only? |
ISLAYOPTS | Internet Store Layout Options |
ISLAYOUT | Internet Store Layout Template |
ISKIT | Inventory Kit? |
INVTRACK | Inventory Tracking Mode |
ITEMCODE | Item Code |
KEYWORDS | Keywords |
KITSHOWSAV | Kit Savings Message |
LABELDESC | Label Description |
LABELQTY | Label Qty |
COUNTDATE | Last Physical Count Date |
LASTRCVDATE | Last Receive Date |
LASTSALEDATE | Last Sale Date |
LISTPRICE | List Price (MSRP) |
MFRPARTNO | Manufactuer's P/N |
MFR_PUB | Manufacture/Publisher |
MEMO | Memo |
MENUCOLOR | Menu Color |
MENUORDER | Menu Order |
MINPRICE | Minimum Price |
MODCOUNT | Modification Count |
NOTE | Pop-Up Note |
PRICEMODEL | Pricing Model |
PRICESCHEME | Pricing Scheme |
BARCODE | Private Barcode |
PRODNAME | Product Name |
TAGS | Product Tags (Online) |
KITORDCOMP | Put Kit Components on PO? |
QTYCOUNTED | Qty Counted |
QTYMULTIPLIER | Qty Multiplier |
QTYONHAND | Qty On Hand (QOH) |
QTYONORDER | Qty On Order |
QTYORDRESV | Qty On Order Reserved |
QTYOUT | Qty Out (on loan or rented) |
QTYREQUEST | Qty Requested |
QTYREQRESV | Qty Requested Reserved |
QTYRESERVE | Qty Reserved from On Hand |
QUICKPICK | Quick Pick? |
RCPTDESC | Receipt Description |
RELPRODS | Related Products (Online) |
RENTALMODE | Rental Mode |
RENTALTIME | Rental Period |
REORDERMIN | Reorder Level (Minimum Threshold) |
REORDERMAX | Reorder Level (Maximum Threshold) |
REORDERQTY | Reorder Minimum Quantity |
PRICE | Retail Price |
QTYSCHEME | Retail Quantity Break Scheme |
SALEPERCENT | Sale % Price |
KITMANWEIGHT | Set Kit Weight Manually? |
LOCATION | Shelf Location |
SHIPPRICE | Shipping Price |
SHIPWEIGHT | Shipping Weight |
STDCOST | Standard Cost (Case Cost) |
SCHGAMOUNT | Surcharge Amount |
TOTAL_RCV_AMT | Total Amount Received |
TOTAL_SOLD_AMT | Total Amount Sold |
TOTAL_RCV_UNITS | Total Units Received |
TOTAL_SOLD_UNITS | Total Units Sold |
UPC | UPC (GTIN) |
COST | Unit Cost |
UOM | Unit of Measure |
DESC2LABEL | Use Ext Desc on Labels? |
DESC2PACK | Use Ext Desc on Packing Slips? |
DESC2PO | Use Ext Desc on Purchase Orders? |
ONLINE | Use Online? |
QSCHMEALL | Use Retail Qty Break Scheme for All Levels? |
VARORDER | Variant Order |
VARTEMPL | Variant Template |
VIVALUE1 | Variant Value 1 (Same format for values 1 - 8) |
VENDOR | Vendor Code (Preferred) |
VITEM | Vendor's P/N |
VISIBILITY | Visibility |
WIDTH | Width |
YTD_RCV_AMT | YTD Amount Received |
YTD_SOLD_AMT | YTD Amount Sold |
YTD_RCV_UNITS | YTD Units Received |
YTD_SOLD_UNITS | YTD Units Sold |
How to Import
MPORTANT: Before importing any files into Artisan’s database, MAKE A BACKUP of your data in case you do not import what you wanted and want to go back to a previous point in time.
– Now that the file has been formatted according to the instructions above, you should have the file saved on the computer where you plan to do the import on.
– The file must be closed when importing in Artisan. It cannot be open in another program.
– The file must be saved using one of these file formats:
- Tex (Tab Delimited) *.txt
- CSV (Comma Separated Values) *.CSV
- Database file *dbf
- Tagged Text file *.ttx
- Excel Workbook *xls
- Excel Workbook *xlsx
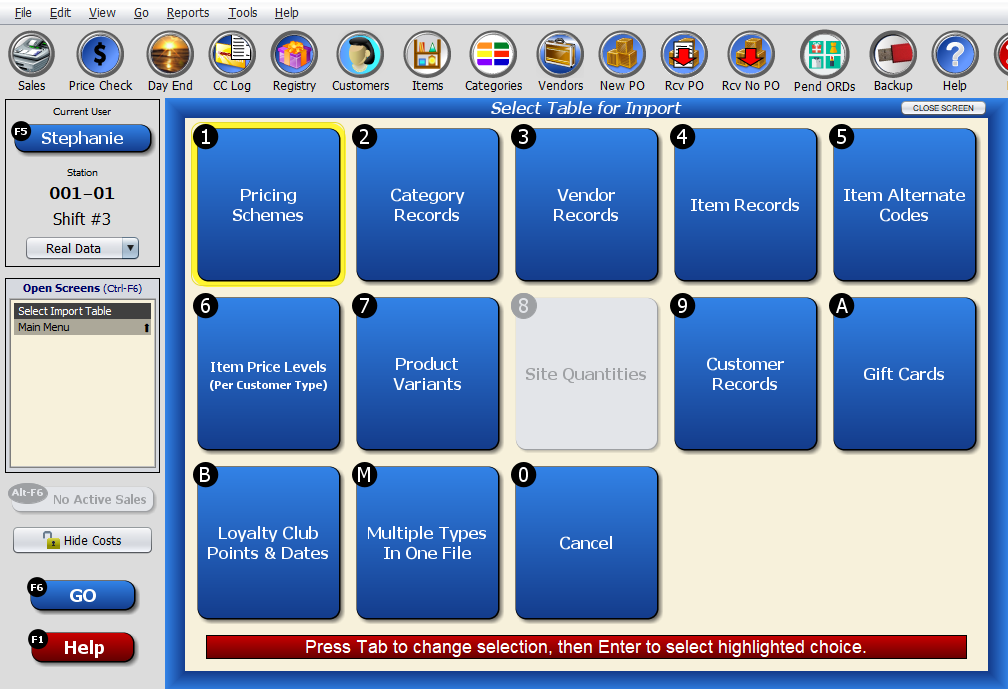
1. Go to Artisan and select “File,” and “Import.”
Choose the type of record you are importing.
2. Choose the file that has been created and select “Open.”
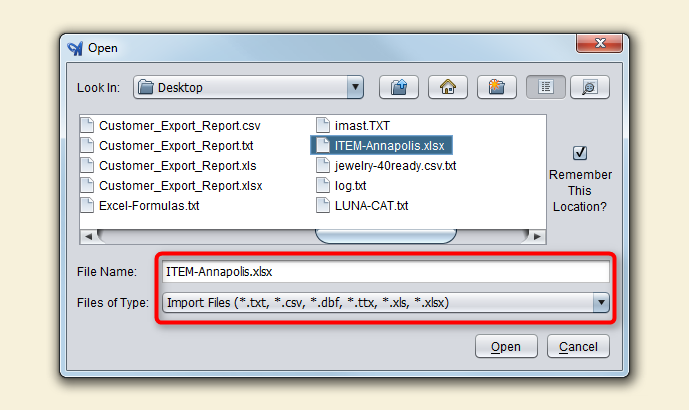
Once “Open” is selected, Artisan will start importing the items and a progress bar will be displayed.

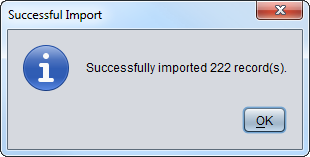
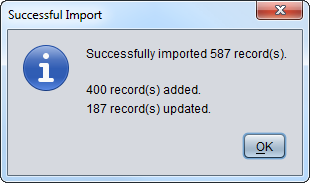
3. If the file was correctly formatted, a confirmation message will be shown next with the number of records “updated” and new records “added.”
Optional: Revise Imported Records (Recommended)
This step is not required as part of the import but ensures everything went well with your files and allows you to reverse the action if needed.
It is good practice to check that the records were imported as intended. Artisan offers its user the ability to search for these records through a “Power Search.”
*If you are not familiar with the Power Search feature in Artisan, learn more about it in this article.
1. In Artisan, go to any type of records you’d like to search. In this example, we will use Item Records, but other records work in a similar way, just with different fields.
Select the Vendor to narrow down the list of items. In this case, PAP – Papyrus is selected.
Notice that there are 2,115 records for this vendor before importing any item.
Under the Item Records Screen, select the Power Search tool on the right side of the window.
2. After we imported our items, we received the following confirmation message (see image below)
- 400 records added
- 187 records updated
3. Using the Power Search tool, follow the image below to query the database through filters. First, we will look at the new items added.
Notice we chose “Created On” and picked the date. We can see that it shows 400 items that were created.
You have the ability to use whatever field you want to query the database. You could use “Created By,” for example, and choose a user to see who added the items. Or, you can add even more filters to have a combination. Feel free to experiment with other fields to see the information retrieved.
