What Are Product Variants?
Product variants are extremely useful if you’re offering products that come in different options.
A product variant is a tool within Artisan that helps group similar products together. Product variants are useful for all sorts of industries and companies, from retail, to firework stores, to jewelry shops, and more. In short–any store that sells multiple versions of one product (whether that’s a different size, color, or other field).
An example of a product that should utilize product variants is a dog bowl that comes in different sizes.

Product variants make uploading items to your site even easier, as it keeps your webstore organized. Click here to learn about utilizing product variants for a webstore.
Creating Base Products
Every product variant needs a base product. A base product serves as the central “hub” you’ll build the items in your Product Variant off of.
To start, head to the “Item Records” screen. Click on “Add A New Record.”
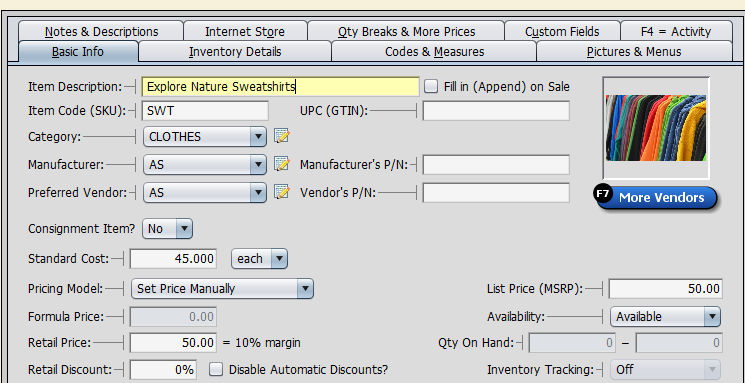
Let’s say we’re selling a dress that comes in three different colors: black, red, and blue. We’ll want to give our base product a general name that fits all of these items. For this example, we’ll just call the base product “dress.”

We’ll need to assign this base product an “Item Code.” This is important, as the item code will be used to connect the items in the product variant to the base product. We’ll call this item code “DRE.”
Fill in the category, manufacturer, and price.
Creating a Product Variant
To begin, click on the “Product Variant Template” dropdown and “Edit List.” (You can also access Product Variants by clicking on “Go” -> “Inventory” -> “Product Variants.”)
Click on “Add A New Record.”

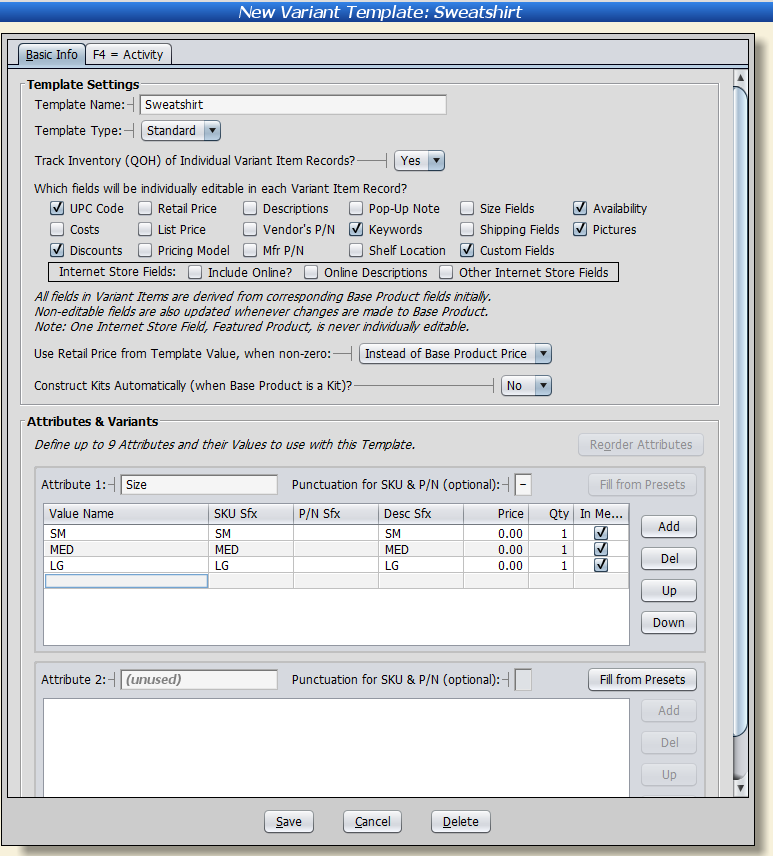
Create a name for this variant template.

Select which fields you want to be editable for each product within the Product Variant. For example, if you don’t check off “costs,” you’ll only be able to edit the price of your product on the base product. You won’t be able to edit the price on the individual products in the variant. The “standard cost” section will be grayed out.
Scroll down to “Attributes and Variants.” Type an attribute into the attribute field and press “Enter” on your keyboard.

Enter the attribute values you want to add. Press “Save” when done.

Your base product will now be added to the Product Variant Template.
Note: You can add other attribute types if necessary. Right-click on the “Attributes and Variants” screen and select “Configure Columns.” Artisan will display a list of columns already included on the screen, as well as fields that may be added. For example, if you want to add an extended description to your items, click on the field and use the left arrow button to add it to the screen.
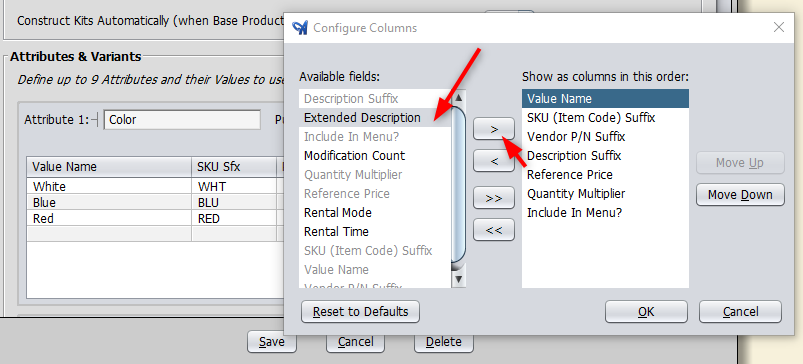
You may change the order of the columns by pressing the “move up” and “move down” buttons. Press “OK” when finished.

Adding an Image
To give the base product an image, click on the “Pictures and Menus” tab and import an image (NOTE: If you’re displaying this base product on your store, the base product’s image will serve as the product’s thumbnail image. It’s a good idea to upload an image that showcases all the different variants you’re offering).

On the “Item Records” screen, you’ll see a list of your variants below your base product. To edit each product, select it and press “Edit This Record.”

Now, you’ve successfully added variant templates to your products.
Other Important Things to Note
The product variant process is quick–even if it might not look like it in this article. It’s truly not as intricate as it seems, and will undoubtedly help you organize your products efficiently. To help speed up this process even more, you can add already existing product variant presets to other products. Let’s learn how.
Using Product Variant Presets
Let’s say you’re planning on selling different style sweatshirts called Explore Nature and Ocean Life, that all come in the same sizes: small, medium, and large. You can create a variant preset to assist the process.

From the “Inventory” screen, select “Product Variants,” then “Variant Presets.”

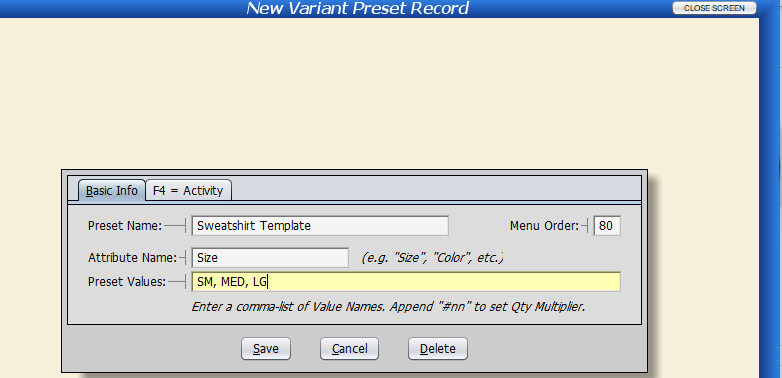
This opens the “Variant Preset Records” screen. Add a new record.

For this example template, we’ll call it “Sweatshirt Template.” We’ll give it an attribute name, “Size.”

Next, we’ll need to insert some preset values. Preset values help fill in information for our product variants.
Next, create the base product, then click on “Product Variant Template” and create a new template.

Give the variant a name, select any fields you want, then click on “Fill from Presets.”

Select the preset from the screen.
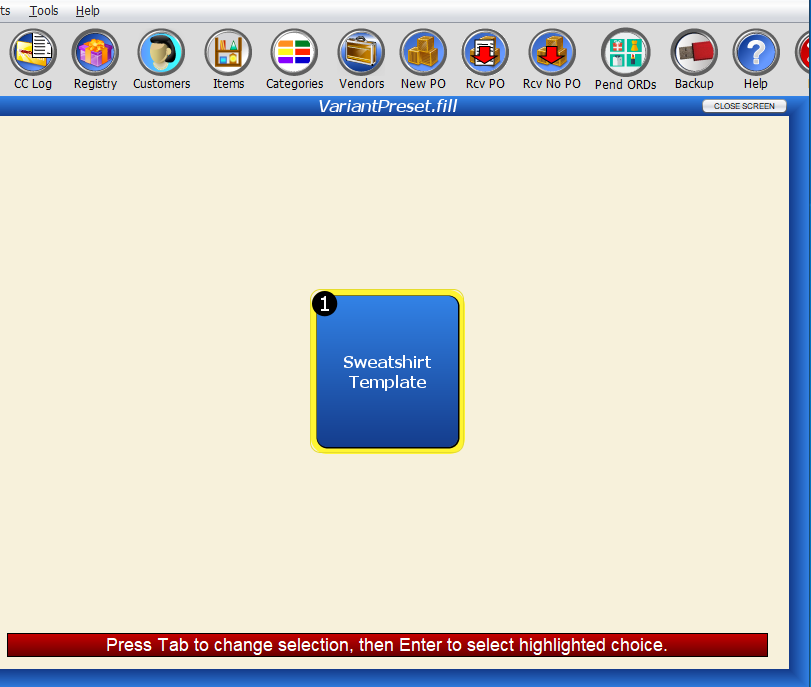
The values we created in this preset will automatically add to the variant.
Once you save the template, the items will show in your inventory.

Let’s say you have another sweatshirt style with those same sizes that you need to create inventory records for. Create the base product, and select the “Sweatshirt” template from the dropdown.


Adding Variant Items to the Quick Pick Menu
You can include variant items in your Quick Pick menu for easy access during the checkout process. There are two ways to do this.
Option 1
Edit the base product and click on the “Pictures and Menus” tab.

From the “Include in Quick-Pick?” option, select “Yes.” Optionally upload an image to display on the Quick Pick.

Now, when you go to select an item from your Quick Pick, it will look like this.

By clicking on the “Dress” button, it opens up all variants (blue, black, and red).

NOTE: If you don’t want to display all of the products in the variant in the Quick Pick screen, edit the specific product and turn their “Include in Quick-Pick?” option to “No.”

Option 2
To add your variant products to the Quick Pick a different way, go to your inventory records and select whichever product in the product variant you want to display on the menu.
From the Pictures and Menus tab, select “Yes.” The item will appear on your Quick-Pick menu.

NOTE: If you want to remove the base product from the Quick-Pick menu (in our example, “Dress“), edit the base product. From the Pictures and Menus tab, change the Quick-Pick dropdown to “No.” The menu will now look like this.

Want to add these product variants to your online store? Here are the tutorials for Shopify, WooCommerce, and Zoey. Want to learn how to convert already-existing (flat) products to product variants? Click here.