Follow these steps to install Artisan on your computer for the first time.
If you’re updating an existing Artisan installation, click here instead.
Installation Steps
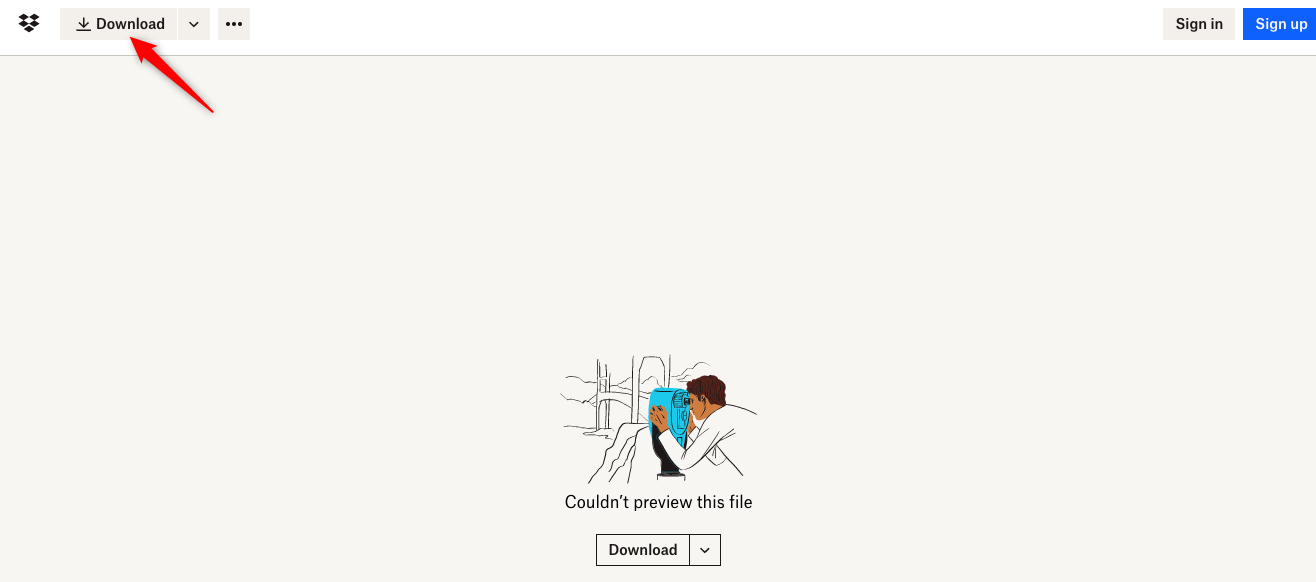
- Click on the Dropbox link provided to you by our Support Team. Depending on the link, it might start downloading directly. If you see a screen like the following, click “Download” to start downloading.
- Depending on your browser settings, the installer might start running as soon as the download completes, or it might ask you if you want to “run” or “open” the downloaded program (say yes). Or, you may have to open your browser’s download manager and click on the downloaded file.
If all else fails, you should be able to find the downloaded installer file in your Downloads folder. It will be named something like “Artisan_POS_v4.9.182_windows-x54.exe” or “Artisan_POS_v4.9.182_macos.dmg”. Double-click on it. - You may be asked to give permission to run, open, or “keep” the file. Say yes.
- When the installer starts running, you’ll see a progress bar while it’s preparing the Install Wizard.

- On Windows only, you may see a “UAC” (User Access Control) prompt requesting permission to allow the installer to make changes to your device. Say yes.

You might also get this prompt a second time, while uninstalling an old version.
Make sure you wait for any UAC prompts and answer them quickly. If you wait too long, Windows will cancel the install. - Next, an install wizard will appear. Click “Next” on the “Welcome to the Artisan POS Software Setup Wizard” screen.

- On the next page, select the folder where you would like to install Artisan. You can usually leave the default as it is. This will generally be a folder named “Artisan POS 4” inside either the “Program Files” or (if installed for a single user) your “Local App Data” folder (on Windows) or inside “Applications” (on Mac). Hit “Next” to continue.

- The next screen will show the installation progress. When it’s done, you’ll see the following screen. Check the box for “Run Artisan POS Software” if you want Artisan to start immediately after installation. Finally, hit “Finish.”
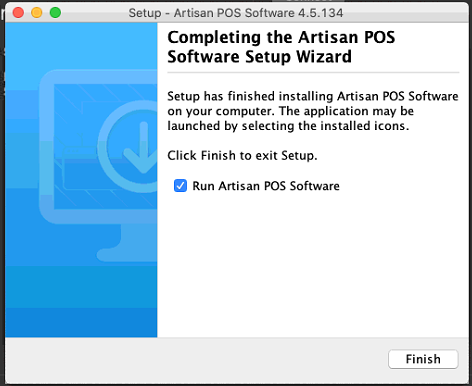
Artisan is now successfully installed. You can run Artisan from the desktop or Start Menu (or Spotlight Search on macOS). Look for this icon:

Special Notes for macOS
The install process on macOS will be very similar to the process described above, though the look of the dialogs will be slightly different. This section describes a few things that will be different on macOS.
- When you open the downloaded installer file on macOS, it will open as a virtual disk image (a “DMG”) containing a single icon, named “Artisan POS Software Installer.app”:
 Alternatively, it might appear embedded in a Finder window, rather than a freestanding window:
In either case, you must double-click on the Installer icon to continue with the installation. - At this point, you may receive an error that the Installer can’t be opened because it was not downloaded from the App Store (or the Publisher was not recognized):
 If you get this message, hit OK, then head to “Security and Privacy” under System Settings (or “System Preferences” on some versions of macOS).
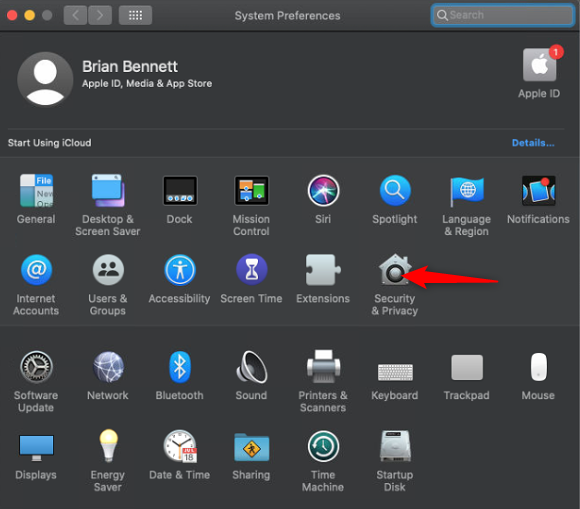
In the next screen, somewhere near the bottom (depending on your version of macOS), there should be a section labeled something like “Allow applications from” with a button that says “open anyway“, “enable anyway“, or something similar. Click on that button.
Now you should be able to double-click again on the Installer in the DMG window, and it should open this time and start running.
Proceed with the remaining Installation Steps above, then return here when done, for the final macOS step, below. - Finally, on macOS, after the installation is finished and you’ve closed the Install Wizard, you must “Eject” the DMG (virtual disk image).
Right-click (or Ctrl-click) anywhere in the DMG image window, and select “Eject Artisan”: NOTE: The final installer screen on a macOS installation reminds you to do the Eject step: