Program Options
There are many settings and configurations in Artisan, and you may not know everything that you would like to configure at this time. You can come back later and change settings if needed. This is a list of recommended areas to address before you get started.
This menu can be found by heading to “Tools,” then “Program Options” on Artisan’s main menu.

Optional Features
Tools=>Program Options=>Optional Features – This includes a list of all optional advanced program features.
Make sure that all the features you are licensed for and that you want to use are turned on by changing “Enabled?” to “Yes.” The license required for the feature is listed on the right.

NOTE: Not all features are available at the time of this writing. Features will be added according to the release schedule. Please contact CerTek Software for this schedule.
Users
Tools=>Program Options=>Users & Security Settings…=>Edit Users
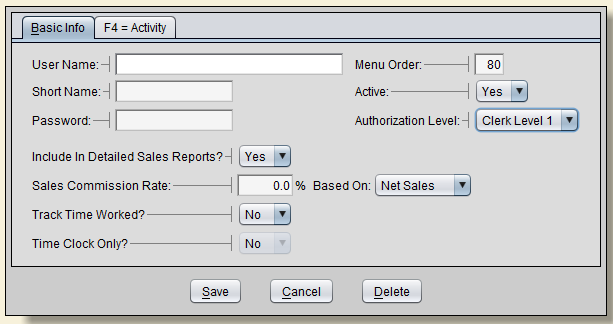
Add users into the system in this screen using the “F3” button to “Add a New Record.”
Select the “Authorization Level” for each user. This allows you to control accessibility once you add passwords. If you are using the Time Clock feature, set the “Track Time Worked?” dropdown to “Yes.”
You can optionally set passwords for each user at this time or come back later and add them. It is important to have passwords for Users if you want to restrict access to specific information. We will cover Security Settings in a separate tutorial and go into Users in more detail here.
Business Name & Address
Tools=>Program Options=>Stations & Sites (Locations)…=>Store Identification
The information entered in here will show on reports and other printed forms, like sales receipts and purchase orders. Click here and scroll to “Store Identification” for more information.

Default Tax Rate
Tools=>Program Options=>Business & Financial Settings…=>Sales Tax Settings…=>Sales Tax Rates
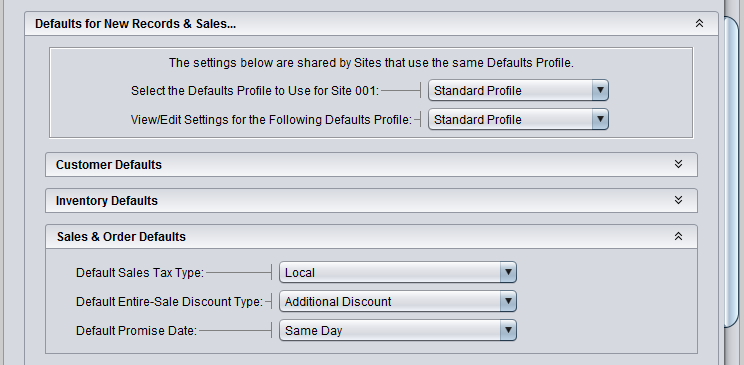
Add any sales tax rates that you use to this table. Save this screen and then return to “Program Options.” Now, go to “Defaults” for “New Records and Sales=>Sale & Order Defaults.” Set your default “Sales Tax Type” from the pull-down option. Alternate sales tax rates are set per category. Click here for more information on tax types.

Numbering Schemes
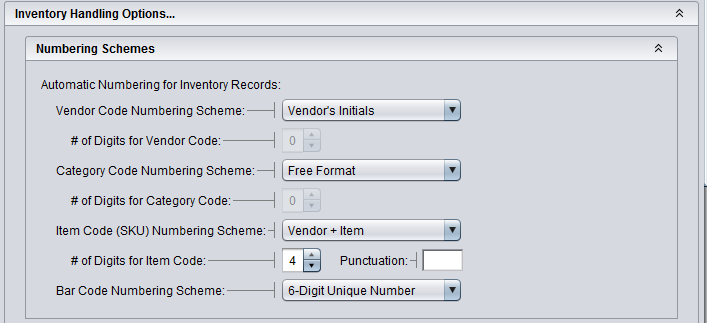
Tools=>Program Options=>Inventory Handling Options…=>Numbering Schemes
This is where you setup how your new records will be numbered, as well as Vendors, Categories, and Items. Select the option that best suits you.
Click this link to find out more about Numbering Schemes.
Device Configuration
Tools=>Program Options=>Device Configuration…

Printers – There is an option to have up to six printers configured in Artisan. Once the printer is installed on the computer, you can quickly configure the printer in Artisan. Add a “Printer Description” and then select the printer from the “Printer Name” pull down menu. Change the “Printer Type” if needed. All printers except label printers can run a test print from this screen.
Printer Assignments – Use the printer number from the list of printers that you have set up on this station to assign where specific items will print. We will cover the different types of forms in more detail in a different tutorial. If you are unsure what to select, leave the defaults in place.
Cash Drawer – The cash drawer is connected to the receipt printer. Once you select the correct printer number, the number you assigned the printer when you configured it in Artisan, and the correct emulation, then the Cash Drawer will open with the test.
Bar Code Scanner – Once the Bar Code Scanner is turned on, it will work with the default settings. Other configurations can be used for special scans like Gift Cards or Customer IDs.
Magnetic Card Reader (MSR) – This is very important if you are using integrated credit card processing. Optionally turn off the setting to “Select” or “Create Customer Record” when the card is swiped or processed.
Payment Processing Settings
This screen must be filled in on each station you want to process credit cards on. We suggest you configure this on the office station in case you take an order over the phone.
Tools=>Program Options=>Business & Financial Settings…=>Payment Processing Settings – All the information that is required on this screen will be given to you by your processing company.
By default, Artisan is set to Use Name from Credit Card or Create Customer Record (if not already selected). If you do not want to use this feature, you can change this setting from GO=>Device Configuration=>Magnetic Card Reader.

Payment Types
Tools=>Program Options=>Business & Financial Settings…=>Payment Types & A/R Terms. The most common payment types are already in this list. To remove a payment type, make the menu order zero. If the menu order of a payment type that you want to use is zero, then change it to be a number. The menu order in the “Pictures and Menus” tab determines the order in which the payment type buttons show in a list. Edit each record to make this change.
The “Deposit Group” number groups the tenders that are deposited together. This helps when reconciling with the bank.
If you have any additional payment types that you use, they can also be added on this screen. Optionally add a picture for the payment button in the cash register under the “Pictures and Menus” tab.

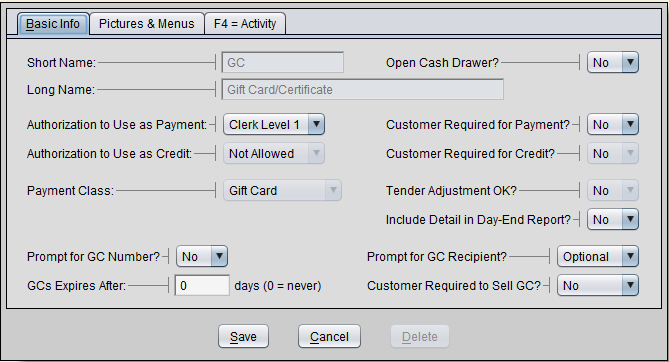
Gift Certificate Numbering & Options
Tools=>Program Options=>Business & Financial Settings…=>Automatic Numbering – If you have existing GC that has been issued, you can assign the “Next Gift Certificate Number” in this screen.
For all other options for GC – Tools=>Program Options=>Business & Financial Settings…=>Payment Types & A/R Terms – Find GC payment type and edit the record. If you have pre-numbered gift certificates, then you can turn the “Prompt for GC Number?” to “Yes.” Other options appear on the right of this screen, including “Prompt for GC Recipient?” which by default is “Optional.”
Cashier Prompting
Tools=>Program Options=>Miscellaneous Program Options…=>Sales Screen Options –To make sure that each sales clerk is assigned to their sales, change the setting “Log Out After Every Sale?” to “Yes.”
There are a number of other settings in this screen that we will cover in another tutorial.
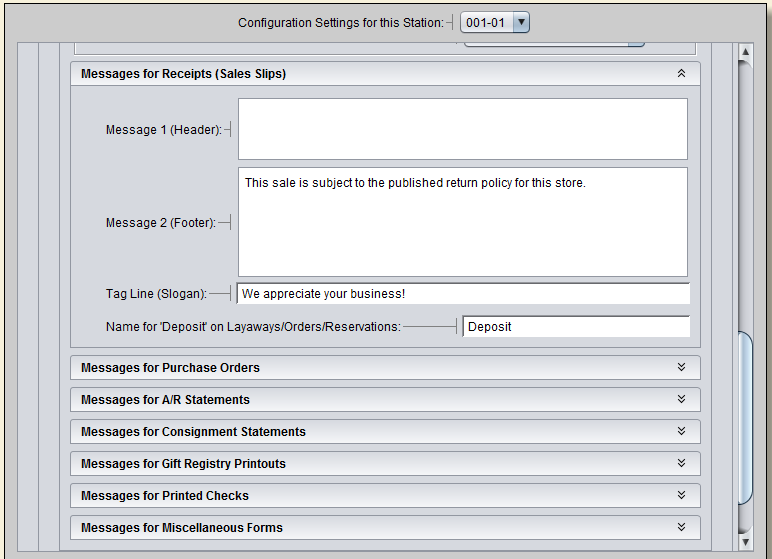
Messages for Receipts & Other Forms
Tools=>Program Options=>Customizing Printed Forms & Receipts…=>Messages for Receipts & Other Forms…
Click on the form you want to add a message to, like your return policy for a Receipt (Sales Slip). Message 1 (Header) will appear at the top of the form under the store information. Message 2 (Footer) will appear at the bottom of the form, normally where you would put your return policy.