An Introduction to Product Variants
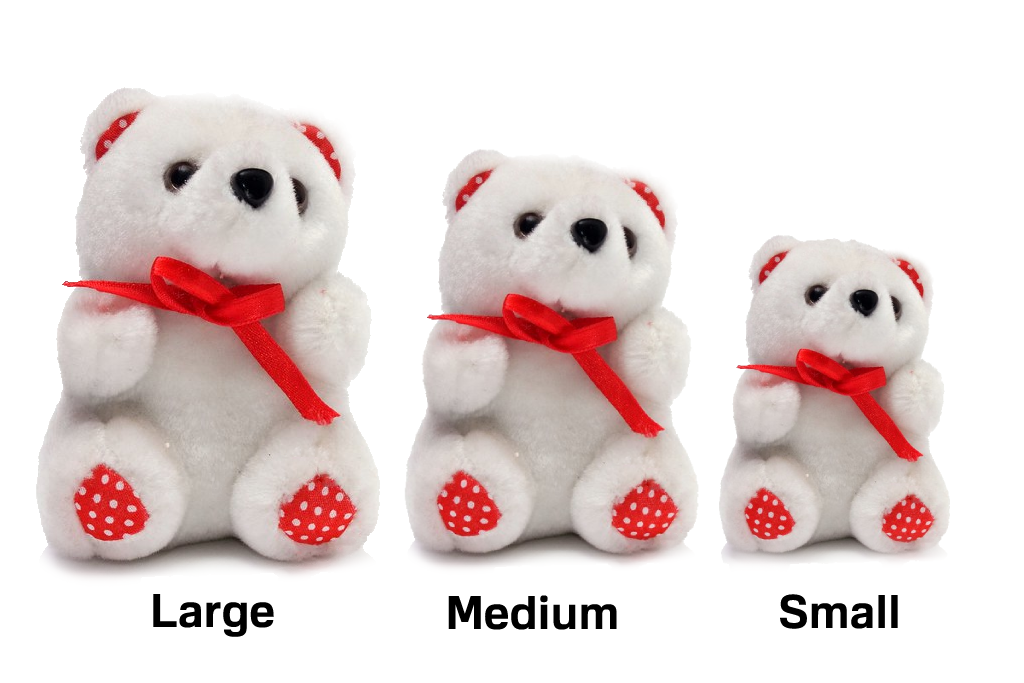
If you’re selling an item that has different options to choose from, product variants are very handy. Some examples are a shirt that comes in different colors, or a toy that’s available in different sizes.

A product variant is a tool within Artisan that helps group similar products together. Product variants are useful for all sorts of industries and companies, from retail, to firework stores, to jewelry shops, and more. In short–any store that sells multiple versions of one product (whether that’s a different size, color, or other field).
Flat Products
Let’s pretend that you own a retail store. You sell a sweater that comes in three different sizes: small, medium, and large. You have these sizes listed individually in Artisan’s “Item Record” screen. These products are known as “flat” products.
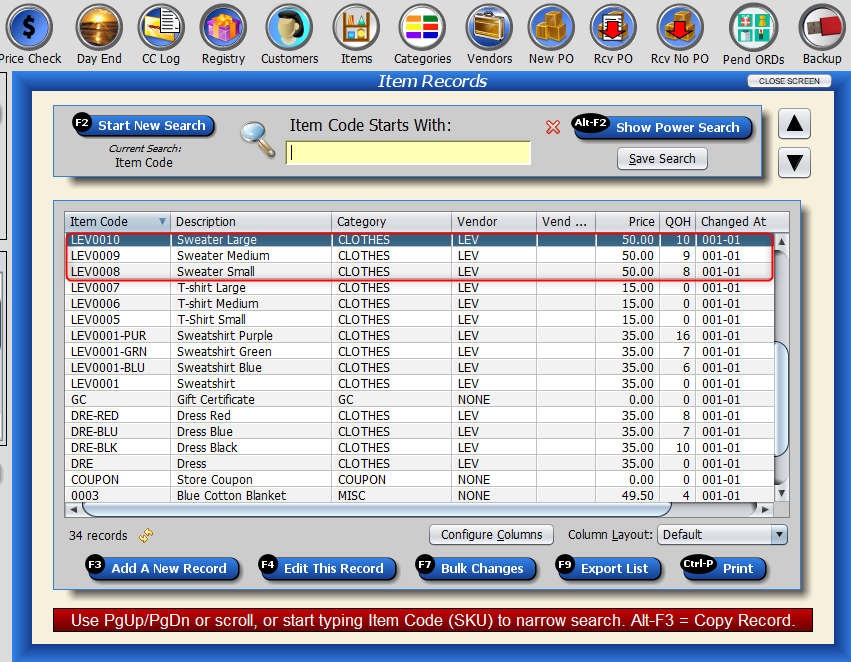
When flat products are uploaded to your store, each product is listed as an individual item, as shown below. This makes it difficult to group these products together, which would be useful for customers browsing your webstore.

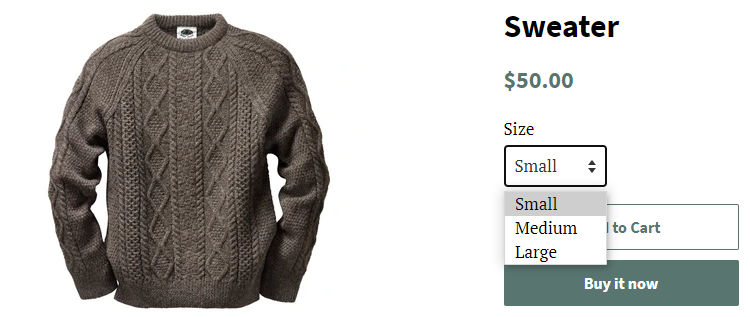
That’s why variants are helpful. Instead of each product being it’s own separate listing on your store, they are included on one listing and filtered by clicking each individual field (such as “small,” “medium,” and “large” in this example).
Creating a Base Product
Before we begin creating product variants in Artisan, we’ll need to make a base product. A base product is the central “hub” for your product variants. In other words, your product variants are connected to the base product.
To create a base product, head to the “Item Records” screen and click on “Add A New Record.“
Give the base product a name. For this example, we’ll call our base product “Sweater.” Next, we’ll need to assign this base product an item code. This is important, as the item code will be used to connect the items in the product variant to the base product. We’ll call this item code “SWE.”

Fill in the category, manufacturer, and price. To give the base product an image, click on the “Pictures and Menus” tab and import an image.
Once you’re finished, “Save” the base product.
Editing Flat Products
Next, go to the “Item Records” screen and locate your flat products. Select a flat product and click on “Edit This Record.”

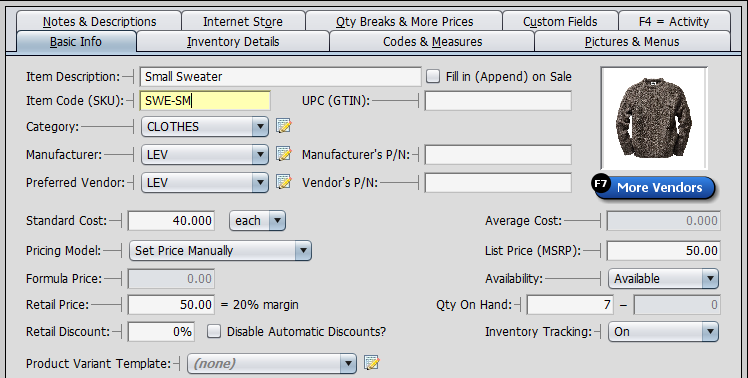
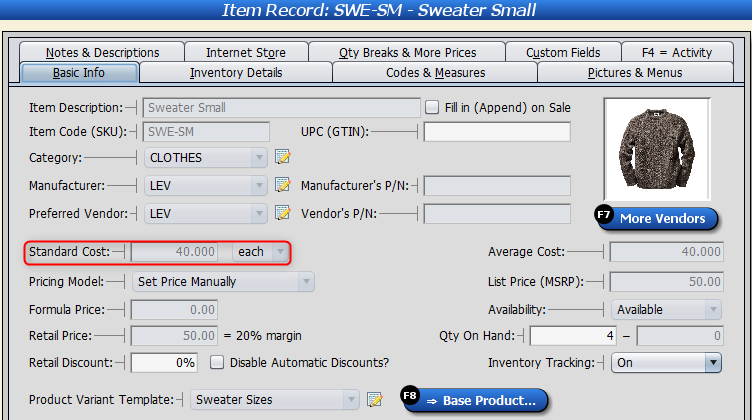
Edit the item code to match the base product’s item code (in our example, we used “SWE“). Type a “dash” after the item code and enter a letter that distinguishes this product from others in the variant (for example, this sweater is a small sweater, so we’ll type “SWE-SM“).
We’ll repeat this process for the medium sweater, changing the item code to “SWE-M.”

Then we’ll repeat this process for the large sweater, changing the item code to “SWE-L.”

Creating a Product Variant
Next, we’ll create the Product Variant Template. Access the Variant Template screen by clicking on “Go,” then “Inventory,” “Product Variants,” and “Product Variant Templates.” Click on “Add A New Record.”
Give the template a name. For this example, we’ll call the template “Sweater Sizes.”
Select which fields you want to be editable for each product within the Product Variant.
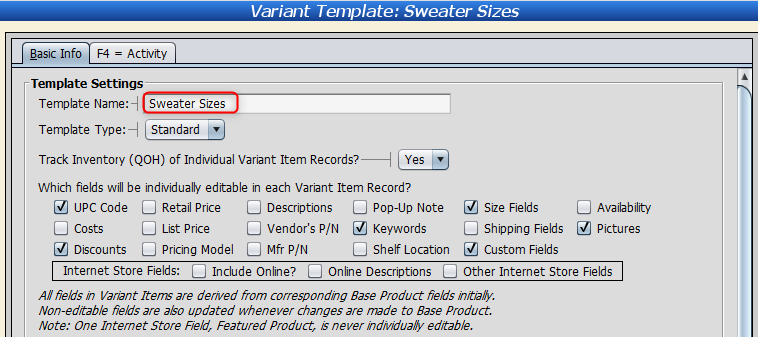
For example, if you don’t check off “costs,” you’ll only be able to edit the price of your product on the base product. You won’t be able to edit the price on the individual product variants. The “standard cost” section is grayed out, as shown here:
When you’re finished selecting which fields you want to make editable for each individual product, scroll down to “Attributes and Variants.” Give the attribute a name. In this example, we’ll call the attribute “Size.” Press “enter.”

Enter your attribute values.In this example, we’ll enter “Small,” “Medium,” and “Large.” Next, edit the SKU. This is important, as the SKU should directly match the Item Codes you assigned your flat products earlier (ex. “SM,” “M,” and “L“).

Once you’re finished, press save.
Artisan will ask if you want to convert your flat products into this variant. Press “Yes.”

Artisan will locate your flat products and merge them into the product variant. This is helpful because Artisan brings over each product’s purchase history, images, and other fields.
Note: You can add other attribute types if necessary. Right-click on the “Attributes and Variants” screen and select “Configure Columns.” Artisan will display a list of columns already included on the screen, as well as fields that may be added. For example, if you want to add an extended description to your items, click on the field and use the left arrow button to add it to the screen.
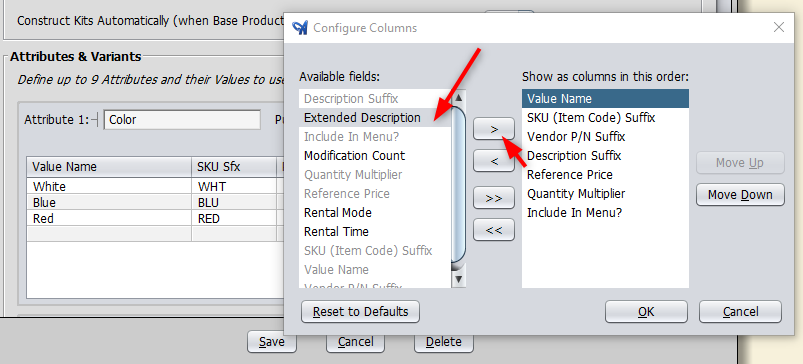
You may change the order of the columns by pressing the “move up” and “move down” buttons. Press “OK” when finished.

You’ll notice that your product variants will show underneath your base product on the “Item Records” screen.

If you don’t want to see all of your product variants on your records list, you can hide them.
To do so, go to “Tools,” “Program Options,” and select “Miscellaneous Program Options.”
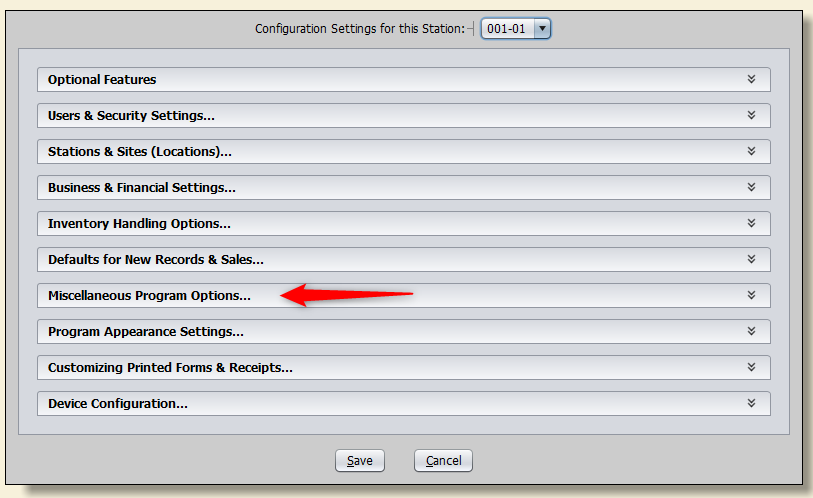
Click on “Item Record Screen Options.”

Under “Hide Product Variants in Default Search List?” select “Yes.” Click “Save.”

Now, your list will just display your base product (and not your product variants).

Now you know how to create product variants for already-existing products. Want to learn how to create variants from scratch, for new products? Click here to learn how. Want to learn how to further organize your online store? Here are the tutorials for Shopify, WooCommerce, and Zoey.